How to Move Outlook to Google Workspace? Methods to Upload PST Files
Microsoft Outlook is the most usable application by many organizations. One can easily store their emails, contacts, calendars but it has a drawback of limited space. Whereas, Google Workspace (formally known as G Suite and Google Apps) is the wide range of email clients to store emails, contacts, calendars and, etc. Google Workspace not only includes Gmail but other useful applications also such as Google docs, Google Drive, Google photos and, etc. Because of its many amazing features, users are starting to migrate from Microsoft Outlook to Google Workspace. In addition, the data is more secure and one can access the data from anywhere and at any time. If you are planning to move from desktop-based email clients to any web-based email client because of the amazing features of the cloud, then, you can do this without a hassle.
In this article, we will be discussing how you can move Outlook to Google Workspace. So, let’s begin.
Do You Know Where PST Files are Saved?
As we all know, the PST is known as a personal storage table. It’s one of the file formats of Outlook which is used to store copies of messages, calendar events, and other items. If you are planning to upload PST files to Google Workspace then you must know the location of the PST files first. In Windows 10, the default location where the PST files are stored is –
C:\Users\user-name\Documents\Outlook Files
The Top Most Methods to Move Outlook to Google Workspace
There are basically two top most methods-
1. Manual Method
2. Automated Method
Manual Method to Move Outlook to Google Workspace
The manual method is an attractive method because it’s a free and simple solution to upload data files. It is known as GSMMO i.e, Google Workspace Migration for Microsoft Outlook tool. With the help of this tool, you can move emails, contacts, calendars, and other data files from Outlook to Google Workspace.
The system must have the Microsoft Outlook application in order to work with GSMMO.
Ways to Use Google Workspace Migration for Microsoft Outlook Tool
First of all download the Google Workspace migration for Microsoft Outlook tool on your computer. Once it is downloaded successfully, install the application on the system.
1. Go to the Windows start menu, and search Google Workspace for Microsoft Outlook to open it.

2. A dialog box will be open on the screen. Login with your Gmail credentials.
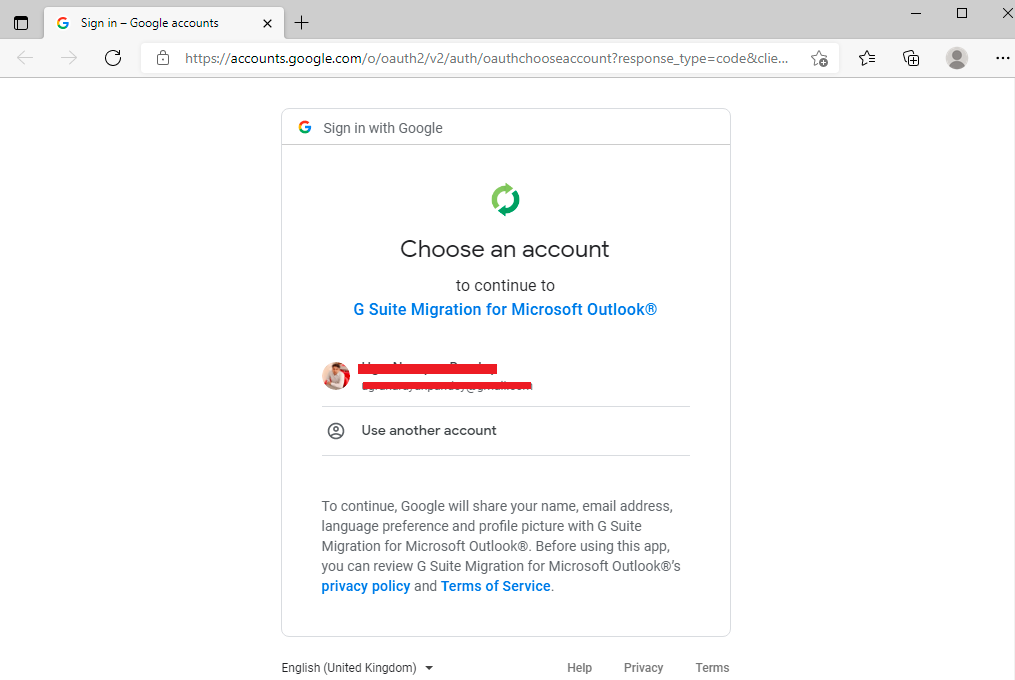
3. Allow the migration tool to manage the Google items by clicking “Allow”.

4.. Now, you will get a notification as Authorization has been granted successfully. Please switch to the application.
5. Now, click on the “G” icon to switch to Google Workspace Migration Tool.
![]()
6. Then after the validation a new window will pop up on the screen, choose the PST files that you want to upload to the Google Workspace account.
7. Choose the default Migrate all data or Migrate only new data and tap the Next button to proceed further.

8. Use the defaults selected for the calendar, contacts and email messages and then click Migrate.

4. The uploading process will start with a progress screen with Pause migration and Cancel button at bottom and the report after completion of the process will be displayed to you on the next screen with Start new migration or Close buttonson the next screen,

5. After the completion of the process, you can verify the imported file. It will be saved as a backup of Outlook .pst file data in your Gmail account.

The manual method can be used to move Outlook to Google Workspace but sometimes, the Google Workspace Migration for Microsoft Outlook Tool Stop Working or gets interrupted abruptly in between and it has some limitations as well.
Drawbacks of Google Workspace Migration for Microsoft Outlook Tool
1. If you want to move Outlook to Google Workspace then you must have Microsoft Outlook installed on your system. Otherwise, you will not be able to upload files.
2. For using the GSMMO tool, you will have to perform multiple steps to upload PST files to Google Workspace. First, you will have to set up the tool then you will need to set up the PST files, and afterward, then you could start the uploading process.
3. The GSMMO utility does not provide the facility to upload the Outlook files to multiple Gmail account. If you ever want to move files then you will need to perform the task again and again for every Gmail account.
4. You will face troubles while importing large PST Outlook files to your Gmail account.
Automated Method to Move Outlook to Google Workspace Without installing Microsoft Outlook
In the above method, we have considered the Google Workspace Migration for Microsoft Outlook tool to move Outlook to Google Workspace but it has some limitations which you will face while doing the process. Even it required the Outlook application on the system without which you can not go further. But, you don’t have to worry now as we have the best solution to your problem. We are going to introduce an amazing solution through which you can easily upload PST files to Google Workspace that too without the installation of Microsoft Outlook on the system. It is known as Outlook to G Suite Migration Utility.
Few Specialities of the Utility to Move Outlook to Google Workspace
1. No need to install Microsoft Outlook to upload the data files.
2. No multiple methods have to perform in order to move Outlook data files.
3. Through this software, you can transfer single or multiple PST files to a single and multiple Google Workspace or Gmail account.
4. In this application, you will get an option to pause and resume the ongoing task during Outlook to Google workspace transfer process.
5. This utility is capable to maintain the folder structure after uploading PST to Google Workspace.
6. It provides an option to remove duplicate contacts during the Outlook data file import task.
7. There is a feature in this application named Map folder feature(s) which helps to change the name of the PST folders.
Step-by-Step Guide to Use an Automated Method to Move Outlook to Google Workspace
Download and Install the migrator utility on your system. Then, run the application and follow the below-mentioned steps.
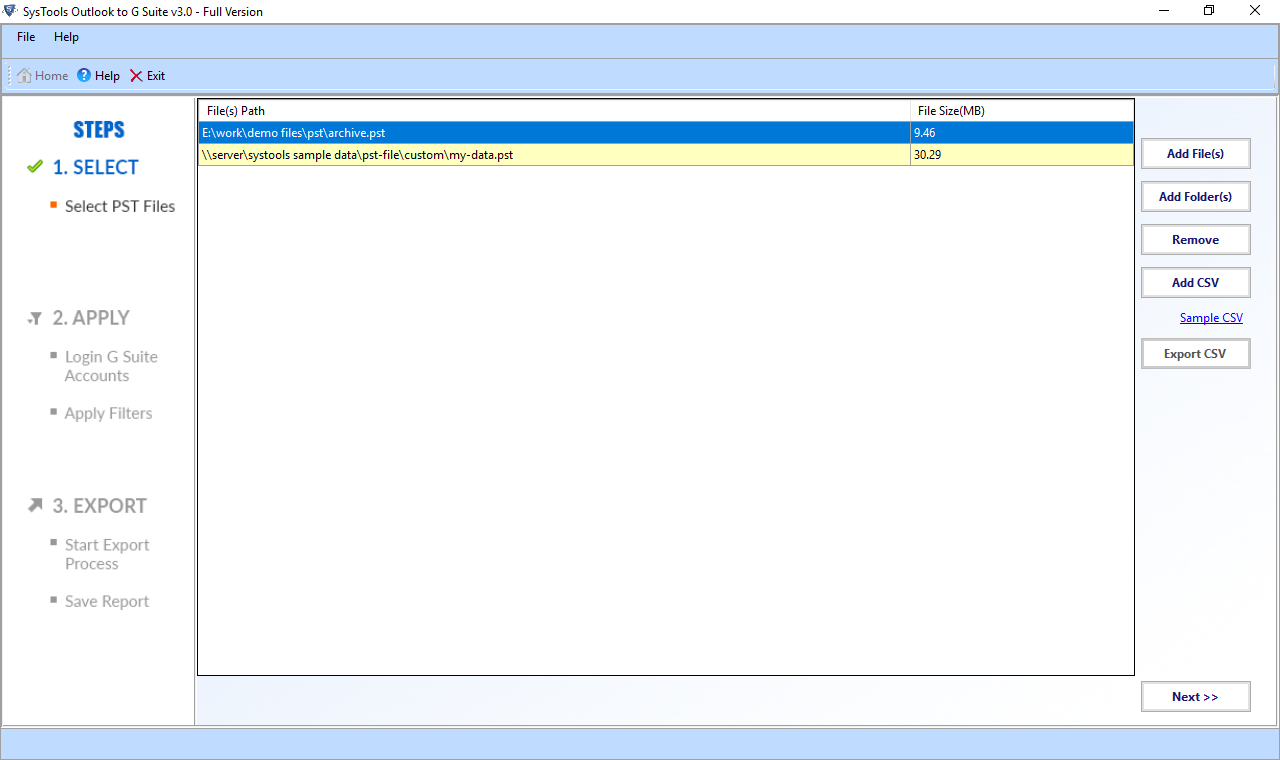
1. Select Add File, Add Folder, Add CSV as per your need
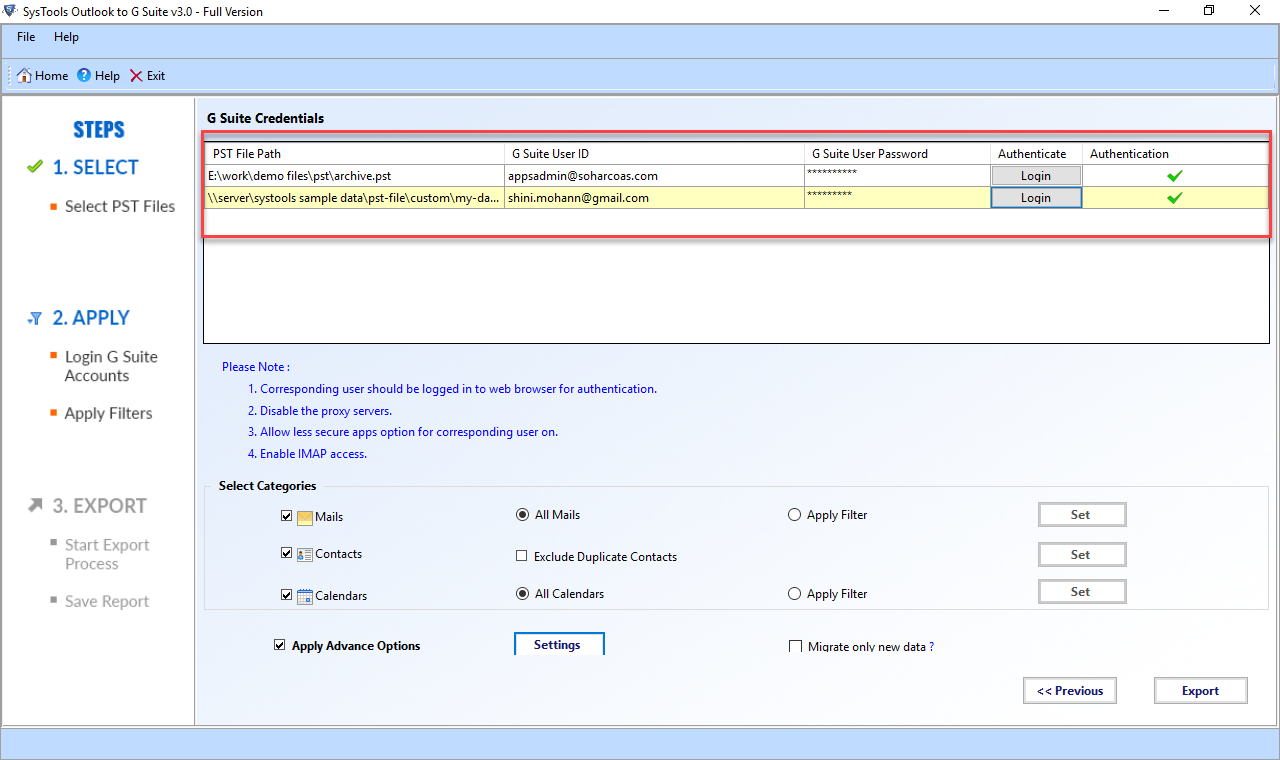
2. Then, add Google Apps credentials and validate your account.
3. Select Categories and apply advance filter options for data backup
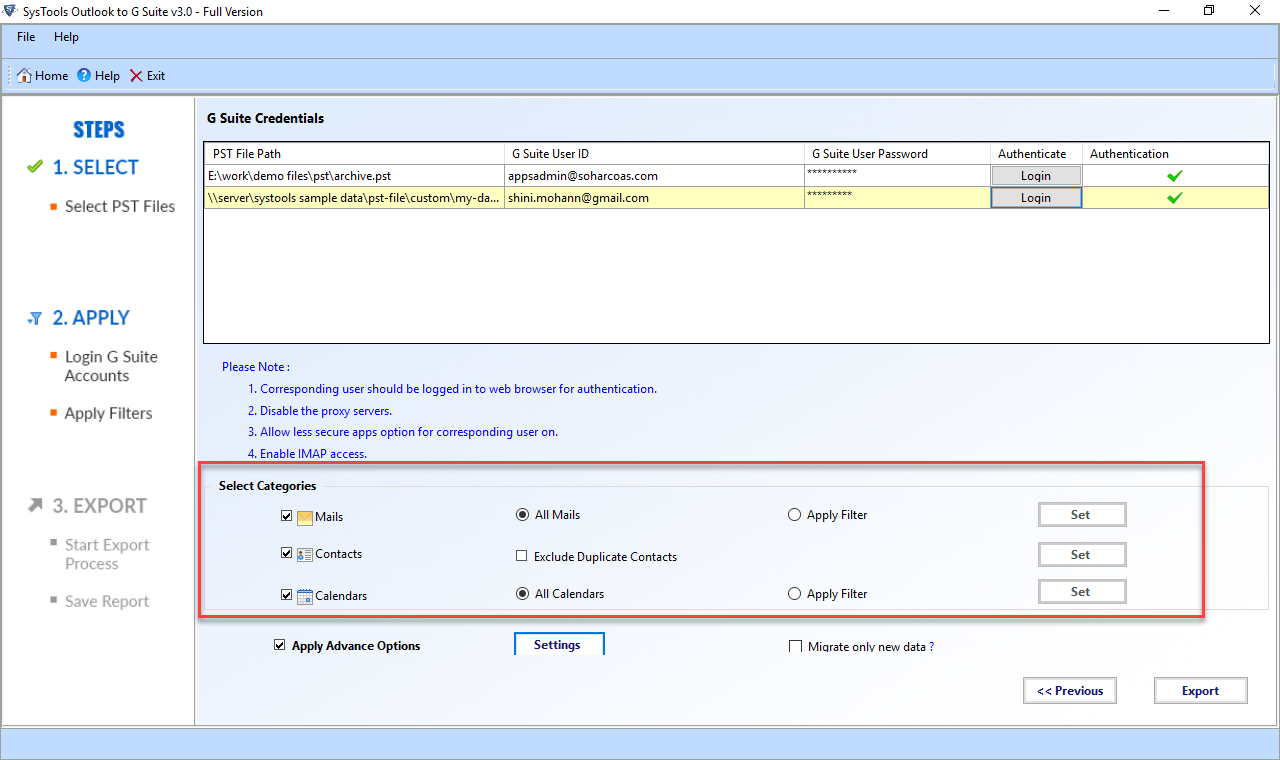
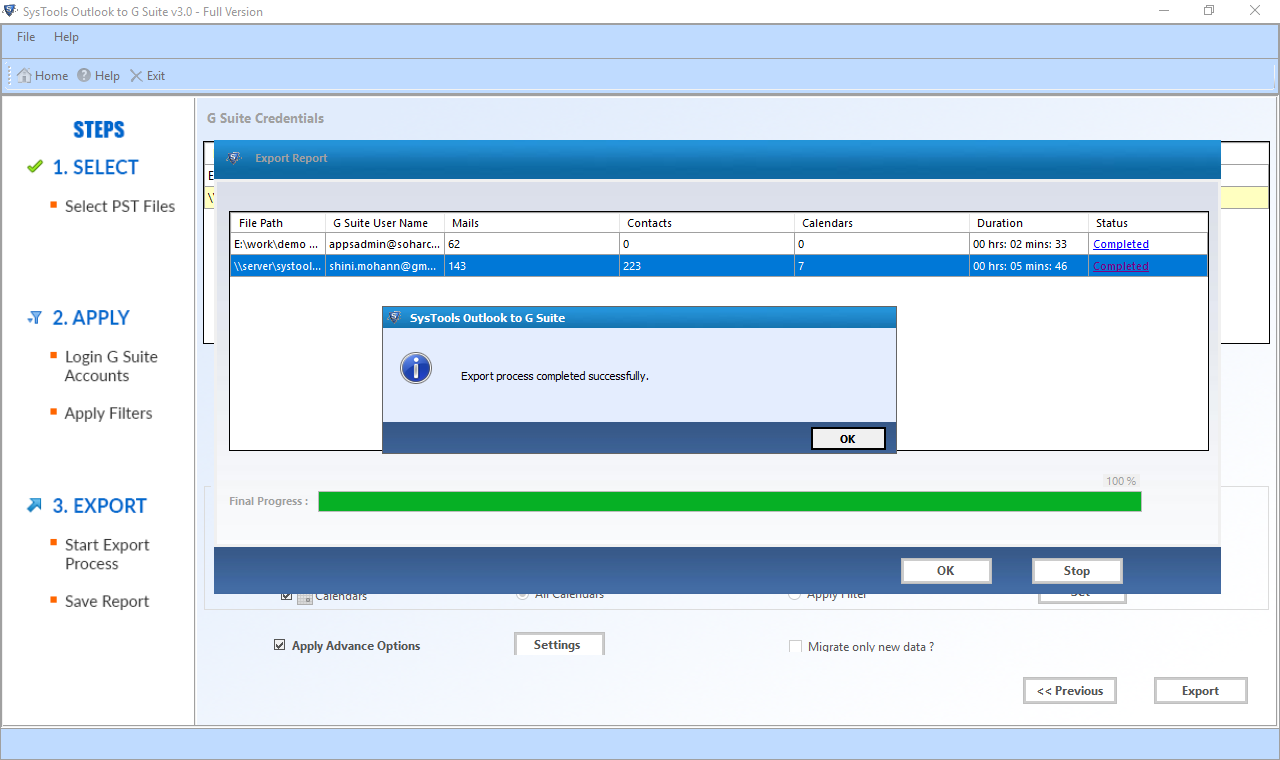
4. Lastly, tap the Export button to upload PST files. After the completion process, you can save the Outlook to Google Workspace migration report in .csv format on the system for future reference.
Conclusion
In this article, we have discussed the manual and automated solution to move Outlook to Google Workspace. You can use the manual method but there are some drawbacks along with it. Hence, you will need the best and reliable solution to upload PST files to Google workspace and the best solution is the Software. It gives you all the required options for moving outlook files. In addition, you can import multiple PST files to multiple Google Workspace accounts and it provides you the data security. The tool has some additional features which are briefly discussed in the article and for more details go to the official website.


