How to Repair Pixelated JPEG Picture in Mac OS? – Solved Query
Summary:- Many professional and home-based users are searching for a reliable solution to repair pixelated JPEG picture in Mac OS. In this following blog, we will explain both manual and professional solution in brief. Read this complete guide to understand and learn about the given methods.
A Pixelated image is a low quality image which however appears to be unclear and grainy. It is usually caused by simply resizing the small pictures or when trying to zoom the image and making it larger. By doing so will help you increase the size of your picture, but not its image resolution. In case, if you need a larger version of a small photo then pixelation can be quite frustrating as it does not displays anything clearly.
But, pixelated picture is not something that can not be fixed. Furthermore, in this following post we will show you how to repair pixelated JPEG picture in Mac OS, so users do not have to work with low quality, blurry or distorted images ever. Simply read this article till the end and follow the step by step methods.
Best Methods to Repair Pixelated JPEG Picture
In order to troubleshoot the pixelated picture, users have to open Adobe Photoshop and then adjust the resolution and pixels settings. By doing so will surely help you out to reduce a pixelation of the low-resolution pictures. Follow these below mentioned steps:-
1. To begin, open your Image in the Adobe Photoshop.
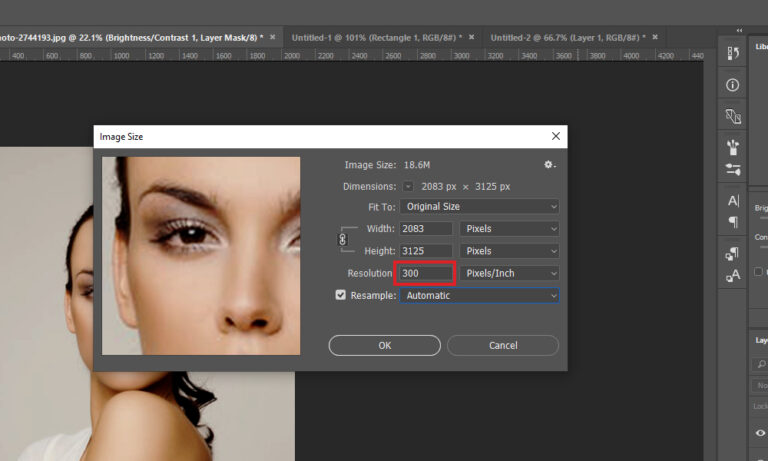
2. In a top bar, users need to go to image option and then image size.
3. Now, change a resolution via 300/more under the box of image size.
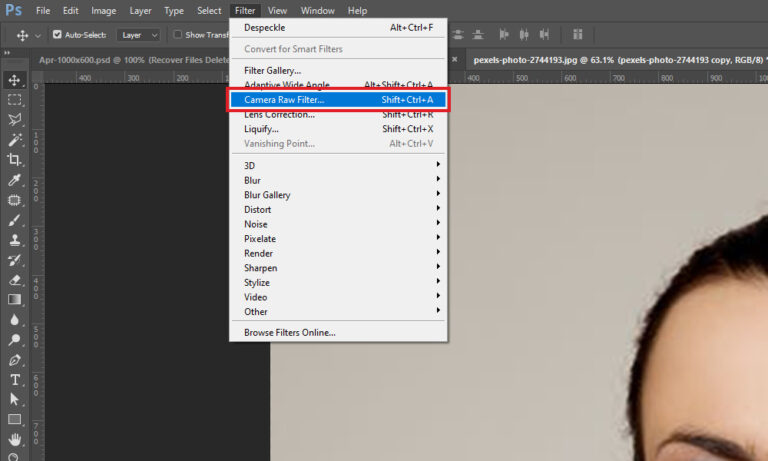
4. After that, navigate to the Filter menu and select camera a raw filter by which you can see in a drop-down.
5. Then, go to a detail box and afterwards adjust a sharpening & Noise reduction till pixelation clears.
![]()
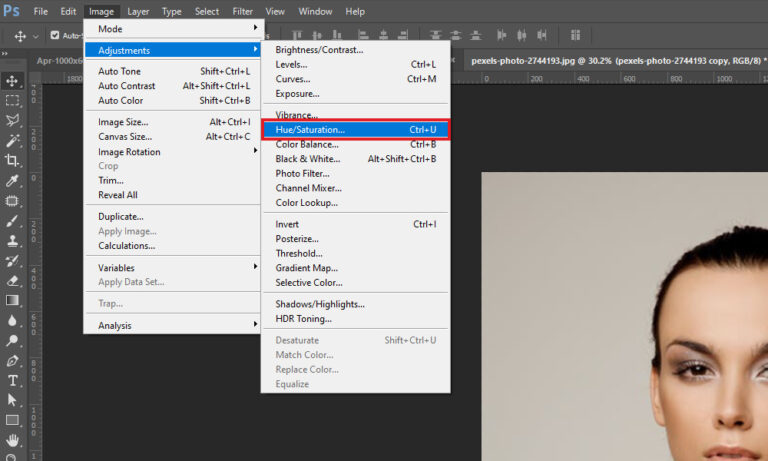
6. From a top bar, go to an image and then select adjustments option. After that, tap on the Hue/saturation and adjust color of the image as per your requirement.
7. Click on the File tab and choose Save option from the drop down list.
Note:- For this procedure, users must have Adobe Photoshop installed on their system.
Use Blur & Sharpen Filters to Repair Pixelated JPEG Pictures in Photoshop
Simply follow these below listed steps:-
Adobe Photoshop offers a wide range of different filter option to sharpen & remove the blur from images. Just simply adjust image pixel settings and reduce the blur, grain or pixelation in your photos.
1. First, Run Adobe Photoshop and then open a pixelated images.
2. In the second step, go to a top bar and then press on filter and after that blur and then Gaussian blur button.
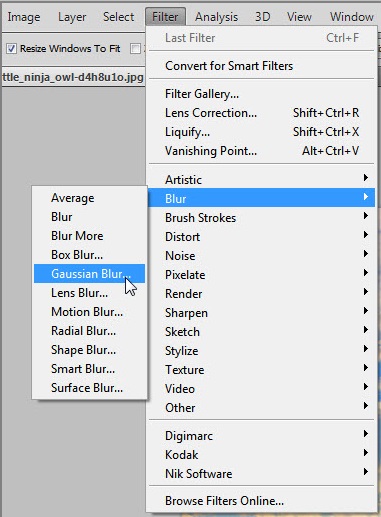
3. Now, you need to adjust a slider to the acceptable level and then click on it.
4. Once again select the Filter option and after that click on the sharpen option and click on the unsharp Mask.
5. Next, adjust a slider to the acceptable level and tap on OK button.
6. In the end, click on the File tab and select the Save option from the drop down menu.
Limitations:
Many people are looking for manual ways to repair pixelated JPEG picture. But as we all know, these type of methods does not always provide 100% accurate results. There are high chances that users may end up losing some of their important information due to manual procedures. And many times you can also lose your structure hierarchy.
In this matter, we strongly suggest you to opt for the Professional solution. Because the automated solution offers multiple benefits to its users which are by the way unable in manual method. It also keeps the quality of the image intact before and even after the procedure.
Professional Solution: Repair Pixelated JPEG Pictures on Mac OS
As we have discussed above, the manual technique have some certain drawbacks that can do more harm than good. That is why, it is highly advised to rely on the professional method. As a matter of fact, there are plenty of third-party applications by which users can repair pixelated JPEG picture. Moreover, the Smart Mac Photo Repair Software will be the ideal option for users to perform this task in a hassle free manner. With the help of this application, users can easily recover any type of fuzzy, pixelated and gray scale images. Not only that, it also supports all the current and previous versions of Mac OS.
Complete Procedure to Use this Repair Tool
Simply follow these instructions mentioned down below:-
1. To start, download and Run this software on your PC.
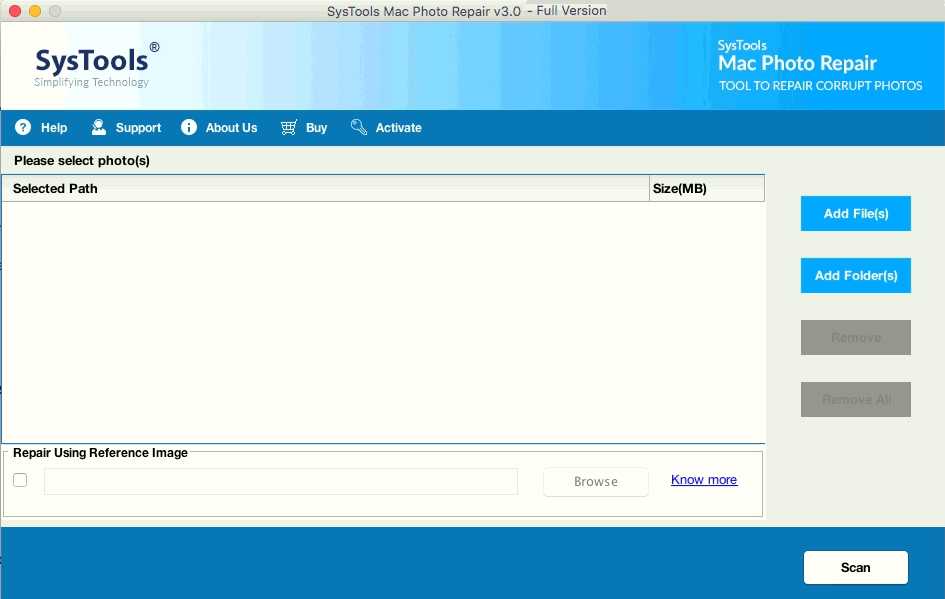
2. After that, select either Add File or Folder(s) option to add your JPEG files.
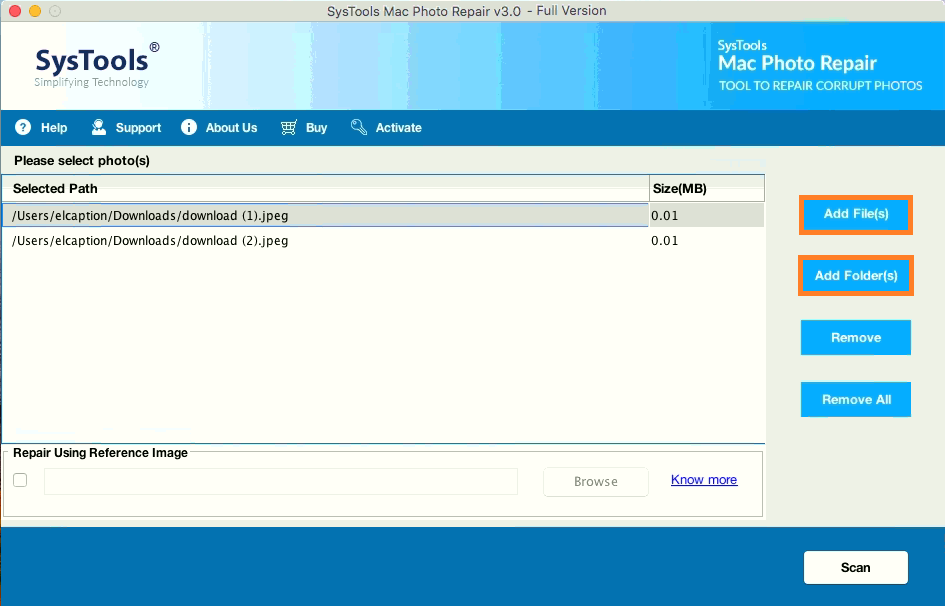
3. Click on the Scan option after successfully browsing your files into the panel.
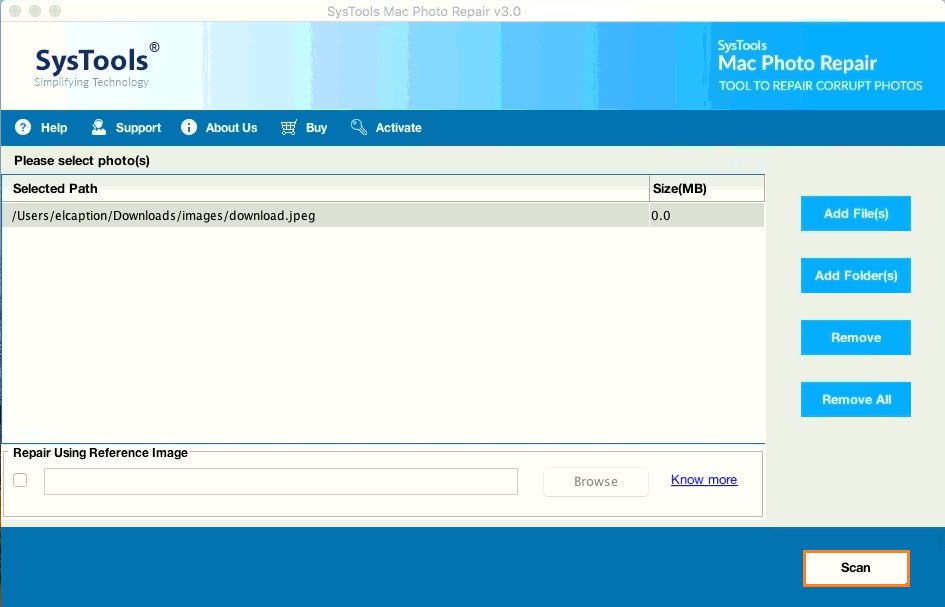
4. Users can also view their files in the panel before the procedure. Then, hit on the Save option.
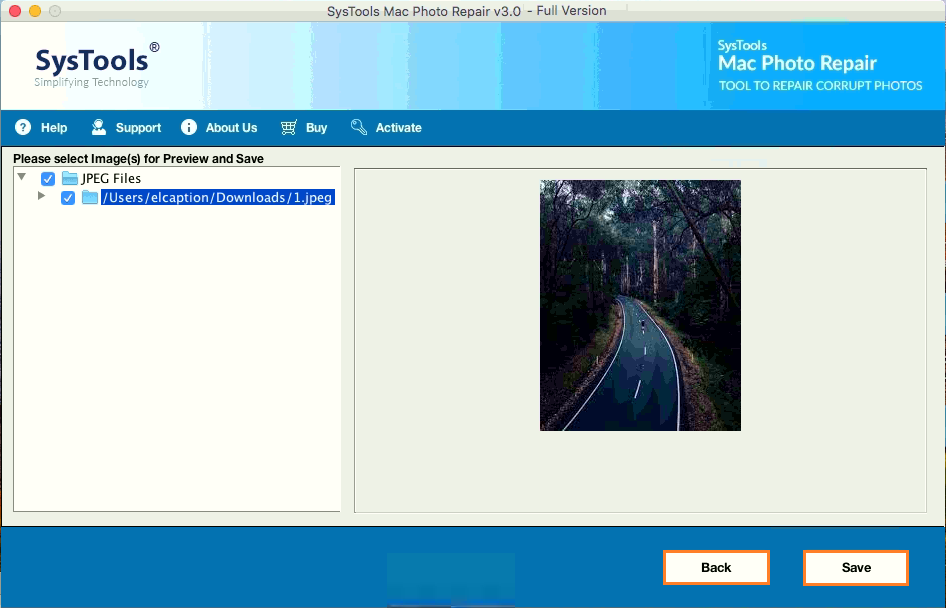
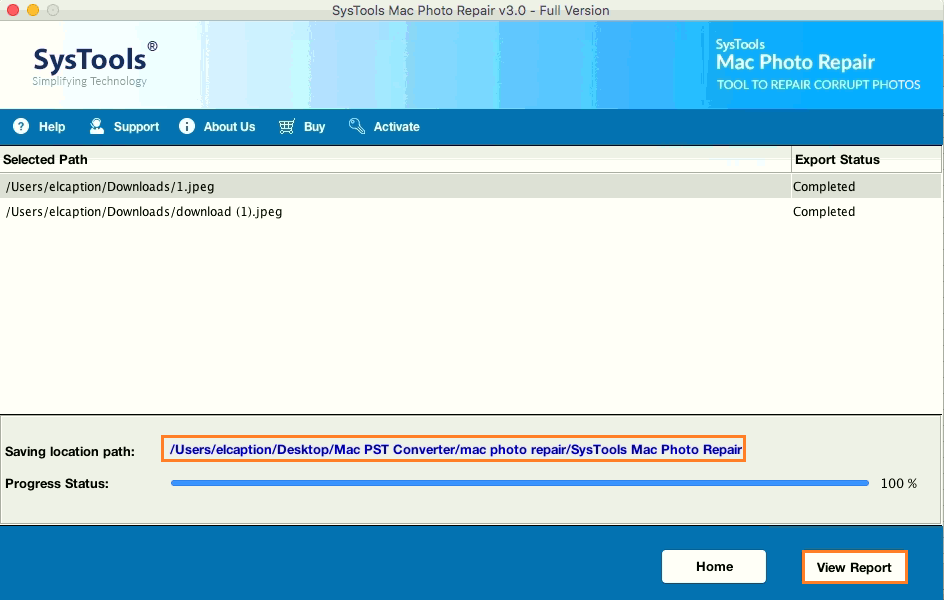
5. With the help of this software, you can also preview your the conversion report by simply clicking on the View report option. Also, the report will be provided in CSV file format.
Key Features of the JPEG Repair Software
- This application allows users to repair multiple images in the same format at the same time. Therefore, it is a quick and simple solution for recovering various corrupted, broken and damaged JPEG files on Mac operating system.
- With this application, this repair tool helps you to recover the embedded thumbnails without even damaging their visual quality.
- Not only that, you can also preview your repaired images before saving them. Along with that, it also keeps the images intact during and even after the process.
- Moreover, it works efficiently with all the latest and previous versions of Mac OS.
- This software also provides a desired destination option for users to repair pixelated JPEG pictures. Otherwise the resultant images will be saved in desktop as default.
Also Read:- How to Convert BMP to JPEG File Format?
The Conclusion
This following blog explains how users can repair pixelated JPEG in Mac briefly along side its disadvantages and advantages. Moreover, users can choose any method which is best suited for them.
Since manual techniques have some serious drawbacks that can affect the quality of the images. That is why, it is highly advised to opt for the professional method that we have mentioned in this following post.

