Best Cloud Email Migration Guide For Admins – Migrate Accounts in 8 Steps


Migrate emails securely & quickly without data loss using the best cloud email migration guide. This cloud-based email migration solution simplifies your migration journey and saves time, money, and resources.
If you are planning to move emails to a different cloud platform. Then, you have come to the right place. We have research for the best possible way to perform this email migration between different cloud platforms. Using this approach you can securely migrate mailboxes between on-premises and cloud environments.
Tips: This guide will help you to perform email migration for G Suite, Google Vault, Office 365, Exchange Server, Lotus Notes, etc.
What do You need For Email Migration in Cloud?
Before beginning with migration, there are few things that are worth noting that:
- Email migration can only be done using the Admin account.
- Require Source & Destination Admin account should available.
- All user accounts should already be created prior to the migration
Best Methods For Cloud Email Migration Without Effort
Although there are manual methods to migrate emails between cloud accounts, but they are only limited to the in-platform migration. No cloud service provides grants an easy way to leave their service. This is why the use of automated migration software comes in the picture. The best software for such a purpose is Cloud Migration Tool. The standalone utility is capable to migrate contacts, calendars as well as drive data along with emails.
Why leave contacts, calendars, and documents? Migrate all user account data from one platform to another. This utility provides cloud email migration between G Suite and Office 365 combinations. Additionally, this utility is now also provided to migrate from the exchanges server to Office 365 also. Whether you are a windows user or Linux user the software is available for both platforms with a similar working procedure.
Features Provided By Tool During Migration
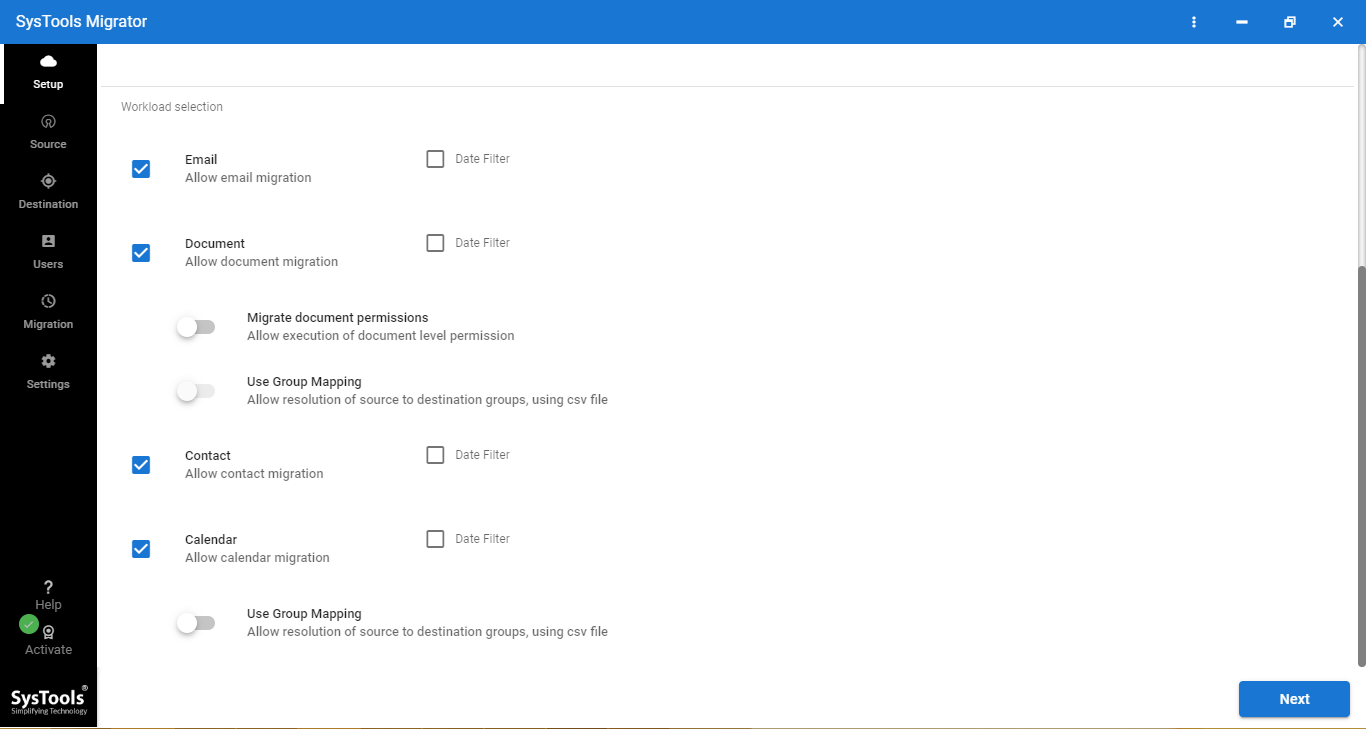
- Complete Account Migration: This single utility is capable to migrate complete account data such as emails, contacts, calendar, and document or each and every user that you want to migrate. The category of data that can be migrated is independent of the source and destination platforms.
- Migrate Permissions: Apart from just migration of data of each category, the tool also allows to migrate permissions between source and destination account. The tool will assist you in migrating document and calendar permissions to destination account that is only available to the source account.
- Delta Migration: This feature mostly helps Admin while migrating a large number of users. After completion of migration once, Admin can initiate another migration and the tool will migrate only new and updated data.
- Stop Migration: During the cloud email migration process, if a user wants to stop the on-going migration then they can use the Stop Migration button. This button will terminate all the in-process migration.
- Easy Mapping Feature: To save you from the trouble of mapping source and destination account the tool provides two options:
- Fetch User: This option will fetch all the user accounts from the source domain and list them in the mapping screen. After fetching is complete Admin can manually provide destination id for each source id.
- Import a CSV: If the Admin already has a list of source and destination, then Admin can import the CSV using this feature. If you don’t have CSV file then one gets a sample file using the Download Template option.
Must Read: How to Transfer Files from PC to Cloud Storage for All-Time Access
8 Simple Steps to Perform Cloud Email Migration Are:
1. Launch the migration tool on your machine and Activate it.
2. After successful activation, select the source and destination platforms.

3. Next, choose the Category as Email to migrated between clouds.
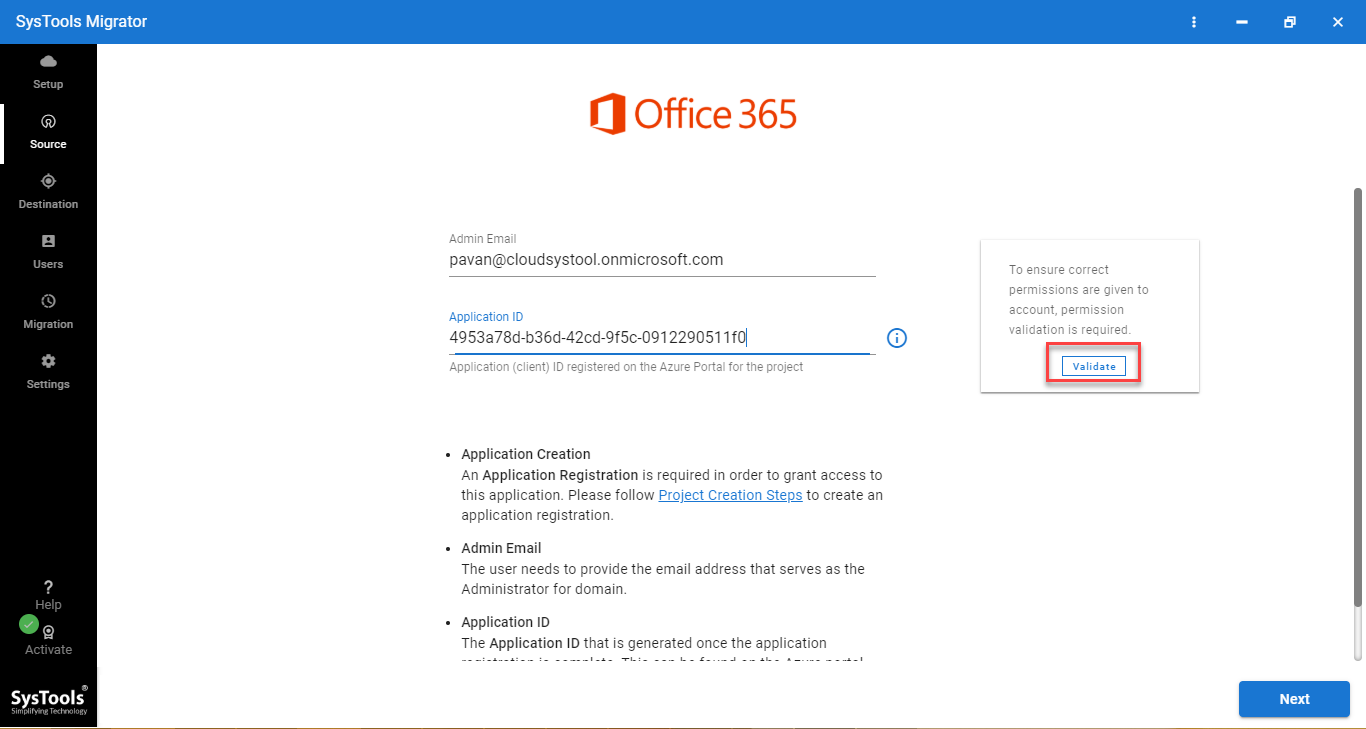
4. From the source tab, enter Admin Id and Application Id and Validate for authentication.
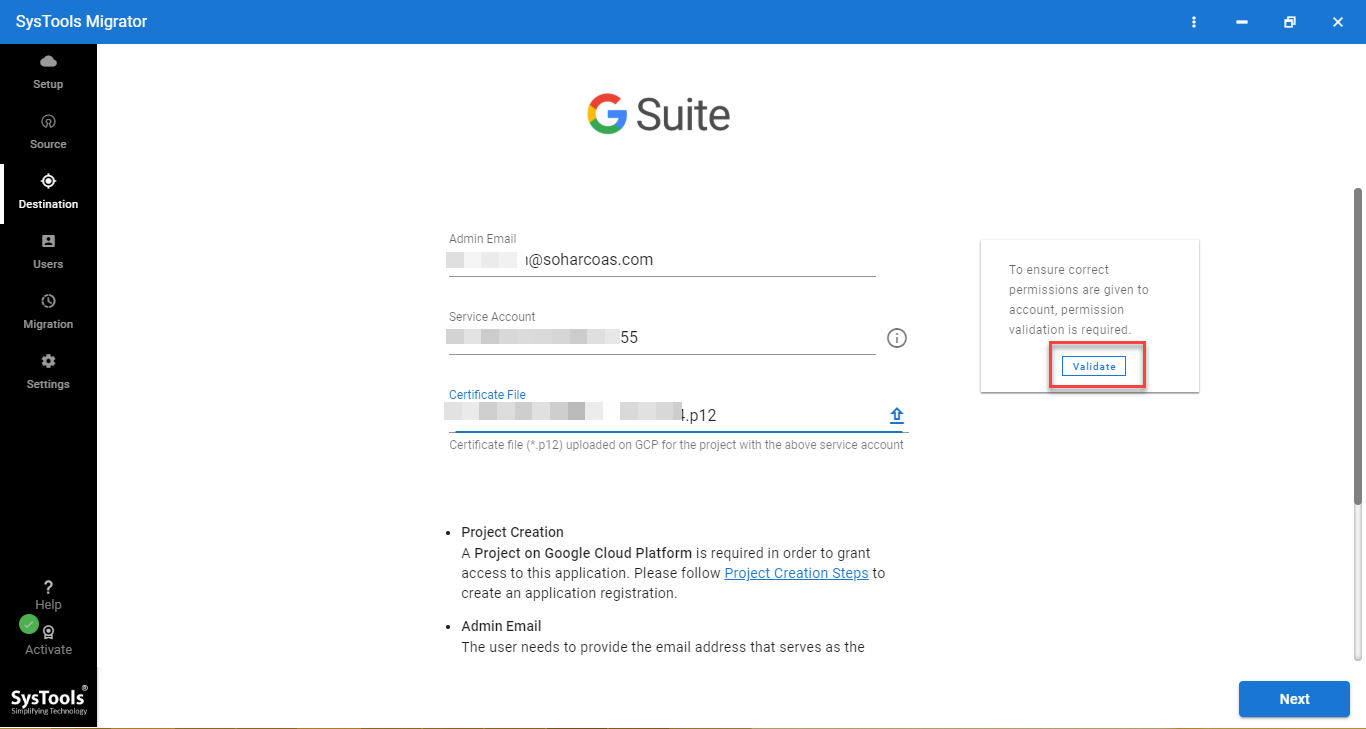
5. Similarly in the destination tab, enter the Admin id and Application Id of the destination domain.
6. After validation, choose the option for source and destination user id mapping.
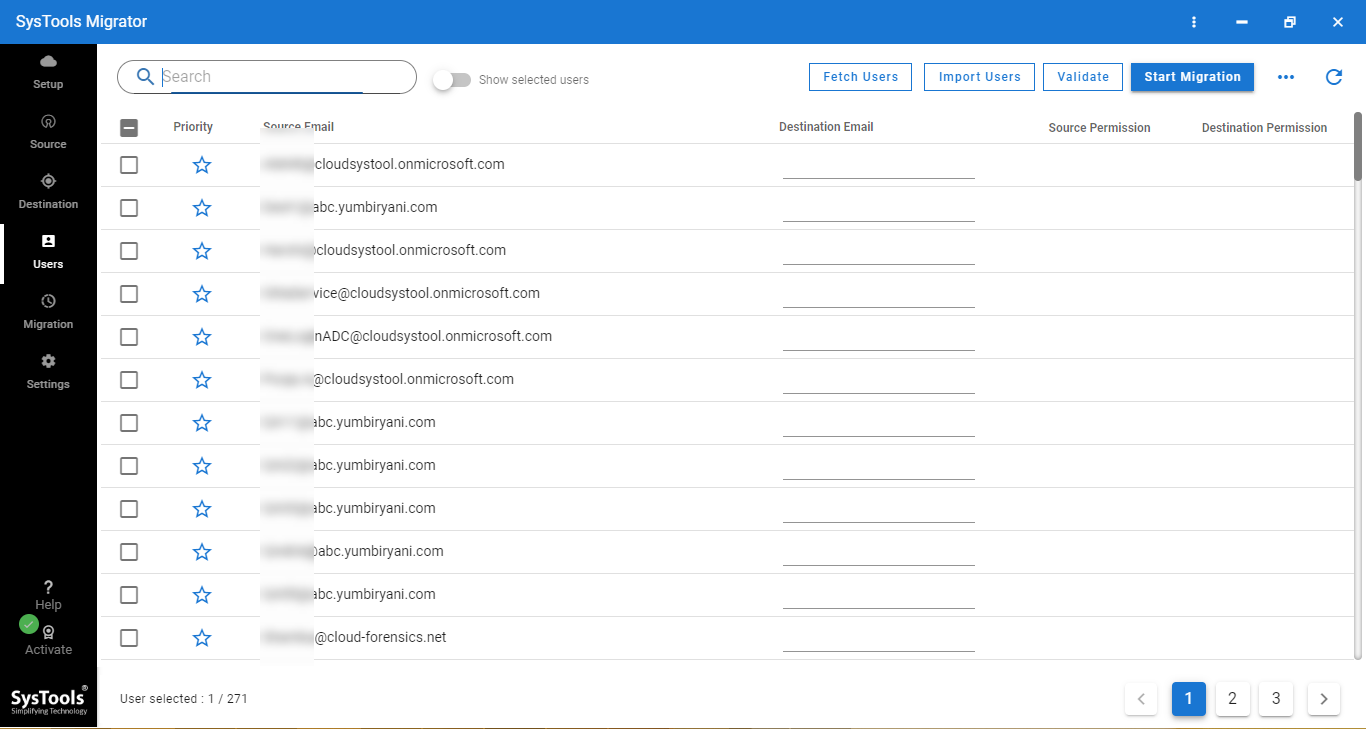
7. Validate the mapped user and click on the Start Migration button.
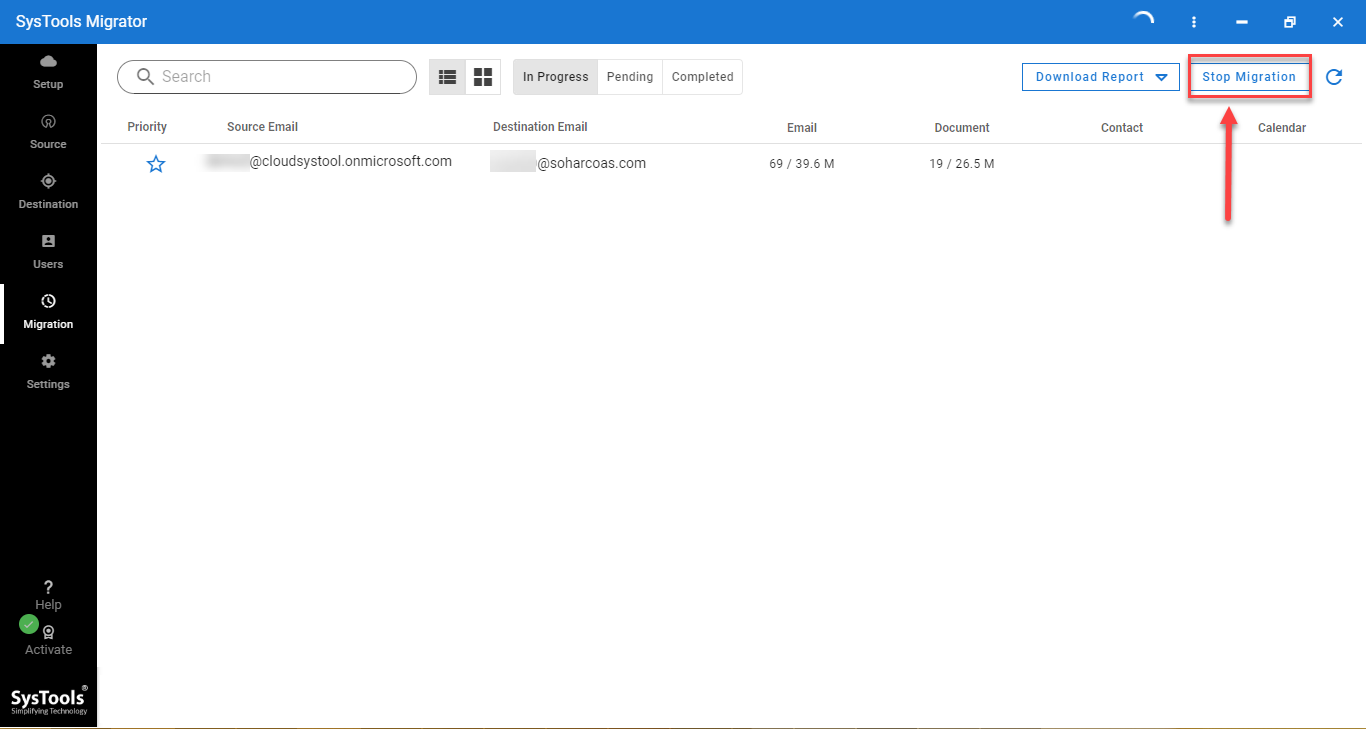
8. After completion of migration, click on the Download Report button.
Related: Best Google Cloud Platform Migration Tools – 2020 Guide
Conclusion
The migration of Emails between cloud platforms is easy when the right method is known. In the above guide, we have explained the working steps of best software for cloud email migration. If you are planning to migrate your user also, then give this tool a try. For testing, the tool comes up with 2 free licenses for complete account migration without any limitation.