Convert EML to PST File for Free – 4 Methods


When it comes to converting emails from EML to PST files, there are multiple methods to do so. Although EML and PST are two distinct email formats, many applications support them both. This post explains 4 methods to convert EML files to PST file format.
So, it is a matter of finding the right email application and utilizing it to get the PST file for Microsoft Outlook.
Here are four different methods available to convert EML to PST file format manually for free and paid software.
Table of Contents
- Methods to Convert Emails from EML to PST File
- Method-1: Use the Drag & Drop Process
- Method-2: Open with Outlook Method
- Method-3: Using Mozilla Thunderbird Client Method
- Export Section: Convert Imported EML Files to PST
- Method-4: Convert EML to PST File for Outlook
- Conclusion
Methods to Convert Emails from EML to PST File
These methods will help you easily export EML files to PST format.
Do note that the three methods allow you to import EML files into Outlook. Once you carry out the steps of one of these methods, you will need to convert EML files to PST format.
That’s why after explaining the 3 methods, there will be an export part that contains steps to convert imported EML to PST in Outlook.
Let us go into details.
Method1: Use The Drag & Drop Process
Assuming that you have all the EML files on your system,
- Open MS Outlook.
- Right-click on the left panel and create a new folder.
- Name it EML files.
- Open the folder containing your EML files on your system while keeping Outlook running.
- Select all the EML files.
- Drag and drop all the EML files to this new Outlook folder (do it for 50 files at a time if you are having an issue).
- Once done, EML emails will appear on your Outlook.
- Now, if you specifically need a PST file, then use the steps mentioned after Method 3 to export the imported EML files into PST format.
Important: You will find this method in most online blogs. But we found a glaring drawback of using this method i.e., Outlook actually treats the EML files as attachments and not email messages. This is also the reason you will not be able to read the message on Outlook as it does not display them. So, use it for a few EML files and proceed only if you can view and read EML data. If not, then this method is not for you.
Method2: Open with Outlook Method
Assuming you have all the EML files on your system,
- Select an EML file.
- Right-click and select Open with.
- Choose Outlook from the list of options and click Ok.
The email will open in Outlook. To move it to Outlook:
- Click on the Move to option from the ribbon bar
- Choose the folder in Outlook where you want to move this email.
- Do this for all the EML files one at a time.
Once all the EML files are successfully moved to one folder, export them to PST using the native Import/Export option. The complete process is defined after Method 3.
It is evident that this method will consume a lot of your time. Importing one EML file at a time is too tiring even with helpers.
Method3: Using Mozilla Thunderbird Client Method
So, this method is never discussed, even purposely skipped, when talking about converting EML files to PST. Although it requires external email clients, this is still a completely free method.
Pre-requisites:
- Mozilla Thunderbird
- Microsoft Outlook
- A new Gmail account.
1. Process in Gmail:
- On your web browser, open Gmail and go to the Gear button >> Settings.
- Go to the “Forwarding POP/IMAP” tab and choose the “Enable IMAP” option.
- At last, click on “Save changes”.
2. Then, Process in Thunderbird
- Now, open Mozilla Thunderbird.
- If it’s the first time, Add account window will open. If not, go to Tools >> Account Settings >> Account Actions >> Add Mail Account to open this window.
- After that, input your name, new Gmail id, and password, and click on Continue.
- Make sure IMAP is selected and click on the Done button.
- Gmail is now configured here.
- Then, drag and drop all the EML files into the Inbox of this newly configured account.
- All EML files are in the Gmail account now.
3. Process in Outlook
- Now, open Outlook.
- Configure the same Gmail account here.
- Once done, you will have access to all the EML files that now reside in the Gmail account.
- You can either move them to the Outlook folder or simply export them into a PST file (defined below).
That’s it..!! With this, you have all the EML files where you want. Now, to convert EML files to PST, in case you definitely need to have a PST file, execute the next section.
Export Section: Convert Imported EML Files to PST
The free manual methods result in having all data in your Outlook account. To export it into a PST file, follow the given instructions:
- In Outlook, go to the File menu.
- Then, Select the Open & Export option.
- After that, click on Import/Export (Import or export files and settings).
- Select Export to a file as the action to perform and click the Next button.
- Then, choose Outlook Data File (.pst) as the type of file and click the Next button.
- After that, select the folder that contains the EML files and click the Next button.
- Browse the location to save the PST file and click the Finish button.
- If you wish to encrypt the file, choose a password. If not, skip this step.
You have successfully exported EML files to PST format for free. Use the file as you wish.
Method 4: Convert EML to PST File for Outlook
If the manual methods are not up to par, you can use EML File Converter software to convert EML files to PST file format in bulk. The tool provides the option to convert EML files and save them as PST, MBOX, PDF, MSG, HTML, etc.
With an easy-to-use and straightforward GUI, you can easily convert multiple files in bulk on both Windows and Mac Operating systems. The steps are as follows,
- Install and launch the software and start the conversion process of EML to PST format.
- Now, locate the folder that contains the EML files from the left panel. This starts scanning and listing the EML files present in the folder.
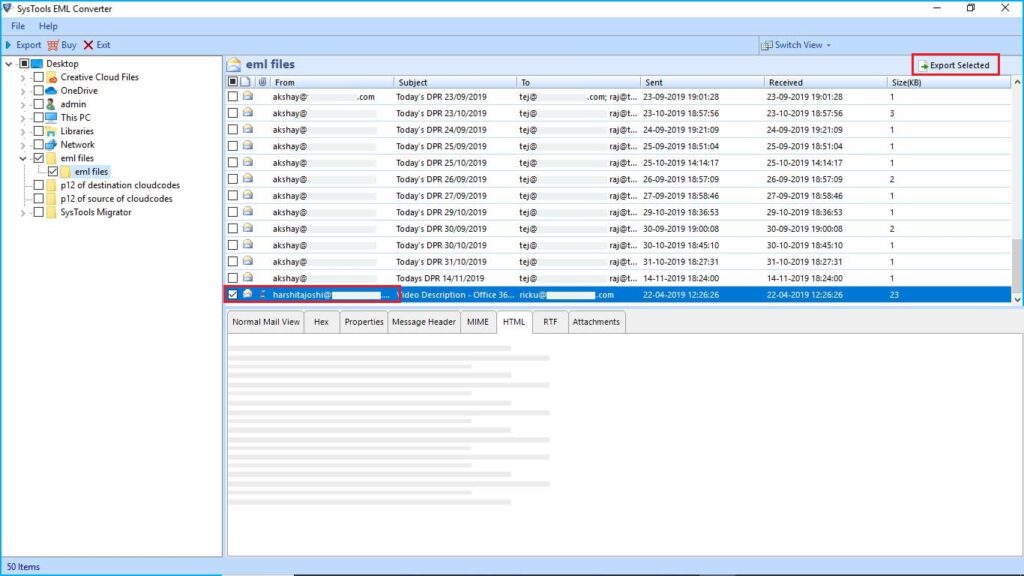
- After that, select either the Export or Export selected option from the ribbon bar.
- Then select PST and click on the ‘Adv Settings’ button.
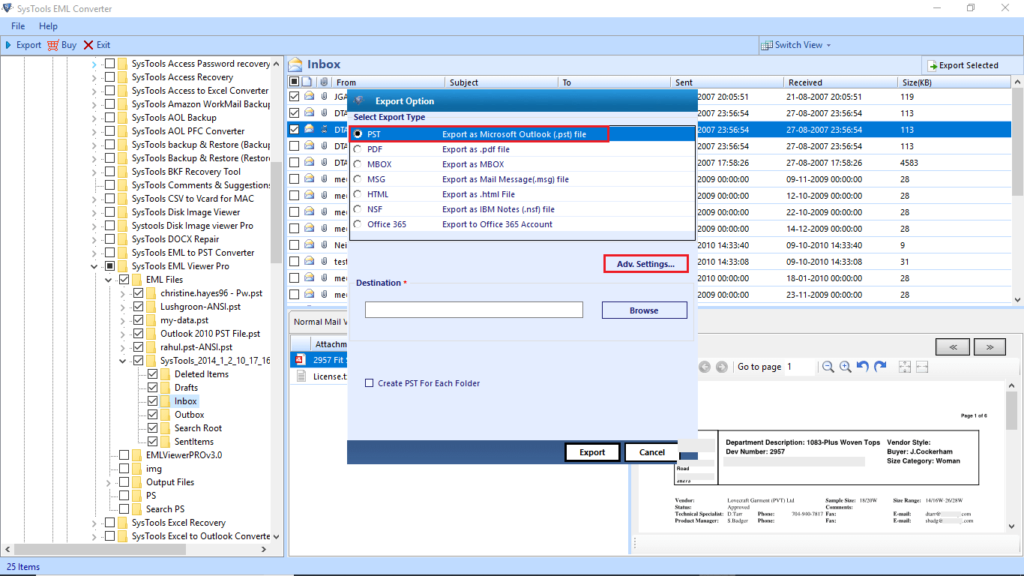
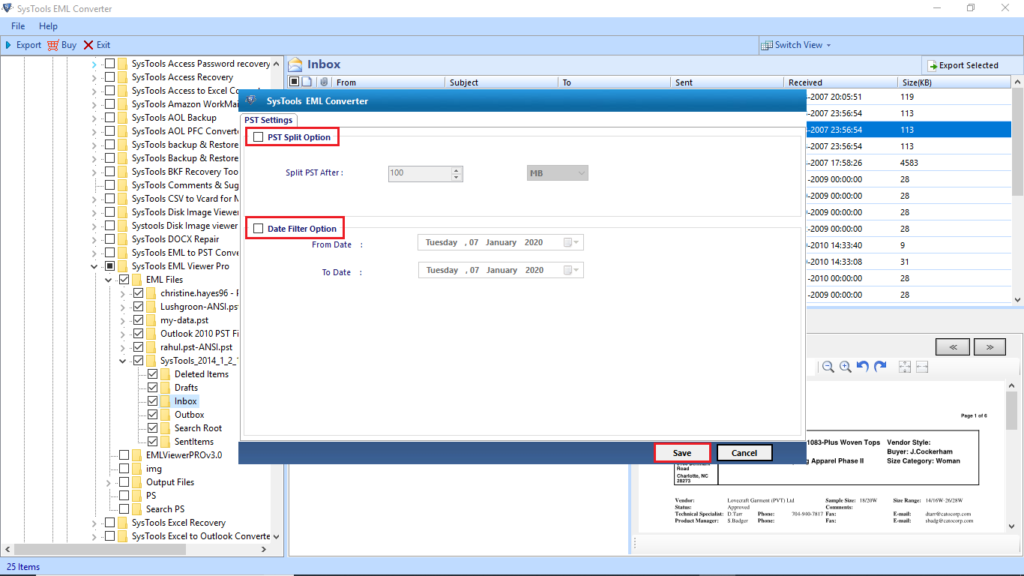
- Apply and save the settings such as PST Split and Date Filter option.
- Then choose the destination location to save the converted file.

- Finally, choose to create a PST file for each folder or the software will create a single PST file containing all the EML emails. Then, click on the Export button to start converting EML files.
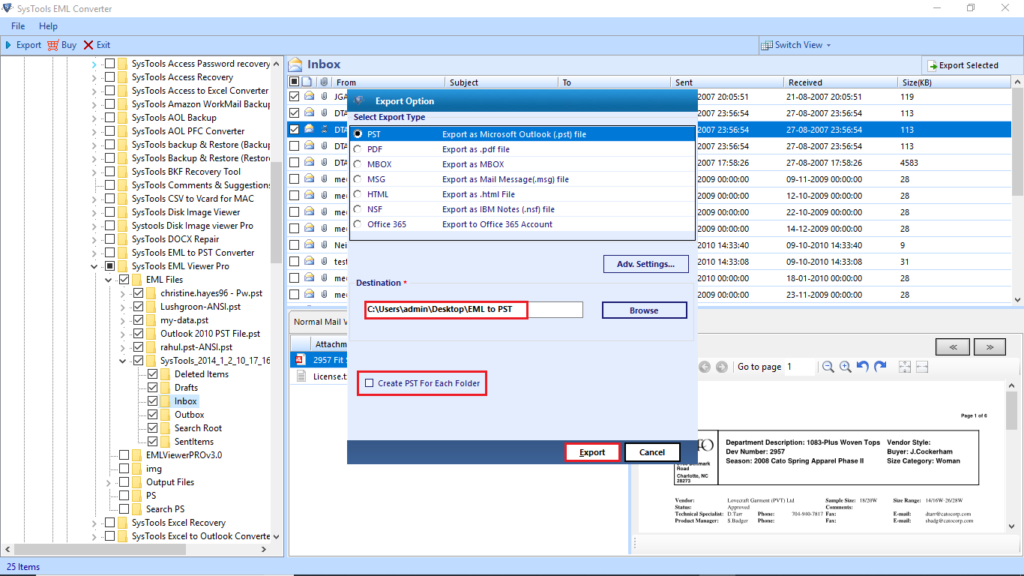
- This will complete the export process successfully.
The software is also available for Mac. Download the free trial version here:
Conclusion
In this guide, we discussed four different methods to convert emails from EML to PST format. You have the option to follow the manual methods or use a professional converter tool to automate the process. The tool keeps the metadata properties and attachments intact. It also supports batch conversion of multiple EML files at once. With advanced options, the tool saves precious time and effort. After all, it is the fastest way to export the EML files to PST file format.