How to Migrate Google Workspace / Google Apps to Office 365? A Guide to Follow


Summary: In this article, we have included everything you need to know to migrate Google Apps to Office 365. There is a manual method lined up for the users along with a proposed automated alternative for the job. Read to know more.
Google Workspace (formerly known as G Suite & Google Apps) and Office 365 are a collection of productivity tools that allow users to work and collaborate in the cloud. Both these suites provide a wide range of applications to create presentations, documents, spreadsheets and manage emails. While G Suite is mostly preferred by small businesses, Office 365 dominates the enterprise environment. As the company grows, it transitions from Google Apps to Office 365. If you are also looking to undergo the same migration, do take a look at the given techniques for seamless data migration.
Different Approaches to Migrate Google Apps to Office 365
There are three ways to migrate Google Apps data into Office 365. You can either opt for a manual method, look for automated software, or outsource the job to a migration service provider. Here, we will discuss the two methods that you have control of, i.e., the manual method and the automated software.
5 Quick Steps to Migrate Google Workspace to Office 365
- Step 1. Complete the prerequisites.
- Step 2. Select G Suite & Office 365 Platforms.
- Step 3. Choose Mailbox Category & Apply Filter.
- Step 4. Log in with G Suite & Office 365 Details.
- Step 5. Fetch & Select Desired User Accounts.
- Step 6. Set Priority & Start Migration Process.
Manual Method to Transfer Google Apps to Office 365 Domain
Step 1. Domain Verification
First, you need to verify the domain used for the G Suite profile. It should be owned by you. Domain Validation is the first step in the setting up process of Office 365.
Step 2. Add Domain Users to Office 365 Account
Here, you need to add a single user or multiple users simultaneously. A license must be added for each user. Before migrating emails, make sure that each user has an Office 365 account. In addition, to access their mailbox, each user must have a license.
Step 3. Create a list of all Gmail mailboxes to be migrated
- To migrate Google Apps email to Office 365, generate a migration file that contains a list of all Gmail mailboxes. It is best to create the file using Microsoft Excel. If you don’t want to migrate all mailboxes at once, you can migrate them one by one.
- Then log into the G Suite admin console by entering your admin credentials
- In the left pane, click the user icon, then select each user to identify each user’s email ID.
- Then, in the Office 365 admin center, log in to Users, then go to Active Users. Make a note of the username column that contains the email address.
- Now, to create a migration file in Excel, start Microsoft Excel on your system
- Enter a name for the line, such as email address, username, and password, then enter the relevant details, respectively.
- Then, save the file in CSV format and close the Excel file.
Step 4. Connect Microsoft Office 365 to G Suite Gmail Account
- First, open the Exchange Management Center (EAC) >> Recipients >> Migration >> Other .. >> Migration endpoints
- Now, click New + to create a new migration endpoint
- On the “Select the type of migration endpoint” page, select “IMAP” for migrating G Suite email to Office 365”
- From the IMAP migration configuration, configure the IMAP server as imap.gmail.com, leave the default settings, and click Next.
- The migration service now uses some settings to verify and test the connection of the Gmail system to migrate Google Apps to Office 365. If the connection is valid, the “Enter general information” window opens.
- On the “Enter general information” page, enter the name of the migration endpoint and ignore the remaining fields.
- Finally, to create a migration endpoint to migrate Google Apps email to Office 365, click on the new button.
Step 5. Create batch migrations and start migrating G Suite mailboxes
- Open Office 365 Management Center, then go to Management Center, then go to Exchange
- In the Exchange Management Center, select “Recipients >> Migration” to transfer emails from Google Apps to Office 365
- Then, click “New +”, then migrate to Exchange Online >> IMAP migration >> click “Next”.
- Click “Browse” to select the migration file
- Next, Office 365 validates the selected migration file. When the verification is complete, click Next. Here, the number of users is shown as the number of Gmail accounts to be transferred
- On the Set Migration Endpoint page, select the migration endpoint created earlier, then click Next.
- Now, on the “Configuring IMAP migration” page, accept all the defaults and click “Next” to migrate data from Google Apps to Office 365
- Next, on the Mobile Configuration page, enter the name of the migration batch specified in the Migration Endpoint Name field, then click the Next button.
- Now to send the migration report to others, click on the “Browse” button
- Then select Auto Start Batch >> New. Next, the migration process starts showing the “Synchronization” status
- Once the migration is complete, the status will be displayed as “Synchronized”
Step 6. Update the DNS records to migrate Google Apps to Office 365
The email system uses MX records, which are DNS records that indicate who sent the email. At the time of the migration process, MX records were credited to the Gmail system. After that, complete the migration from G Suite to Exchange Online, and make sure to target your MX records to Office 365.
Therefore, by performing the above steps, you can seamlessly transfer data from G Suite to your Office 365 account.
Automated Alternative to Migrate Google Workspace /Apps to Office 365
The manual method is time-consuming and unconventional with no real options to customize the process. So, an alternative is to use an automated tool for migrating Google Apps to Office 365. G Suite to Office 365 Migration Tool is a suggested software that can easily migrate emails, contacts, calendars, and documents from Google Apps account. It also provides customized filters and advanced options for user convenience such as:
- Batch Migration of Multiple Domain Accounts
- Filters for Selective Transfer of Google Apps Data
- Delta Migration to migrate newly arrived data
- Move data on a priority basis
- Category selection (emails, contacts, calendar, docs)
- Live progress tracking with dashboard
Steps for How-to Migrate Google Apps to Office 365 Account Safely
Step 1. In the very first step, ensure that you have the necessary permissions, a stable internet connection, and you have kept backups of critical data.
Step 2. Now launch the tool and choose G Suite as Source and Office 365 as the Destination.
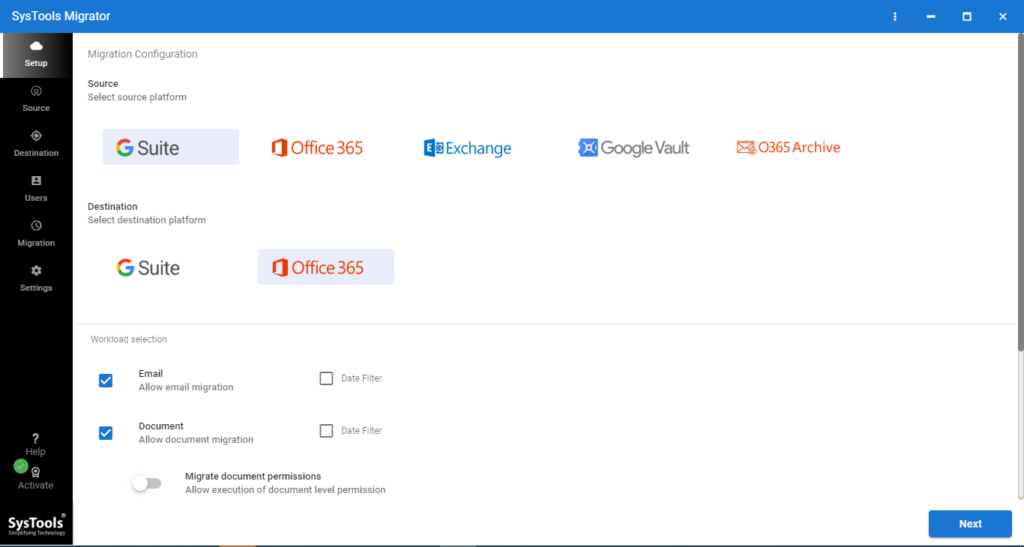
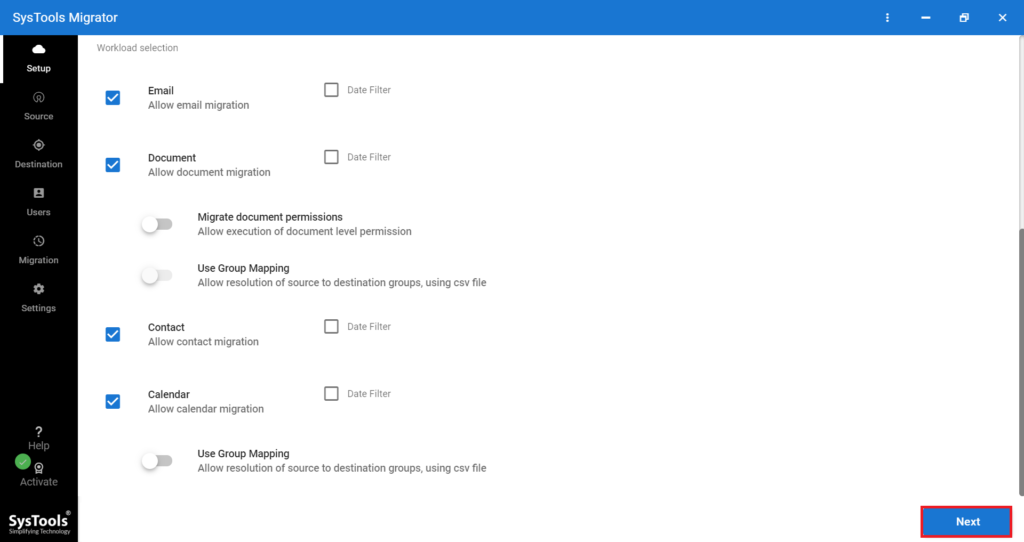
Step 3. Specify the mailbox item data that you want to transfer, such as emails, calendars, contacts, and documents. Apply date filter if required.
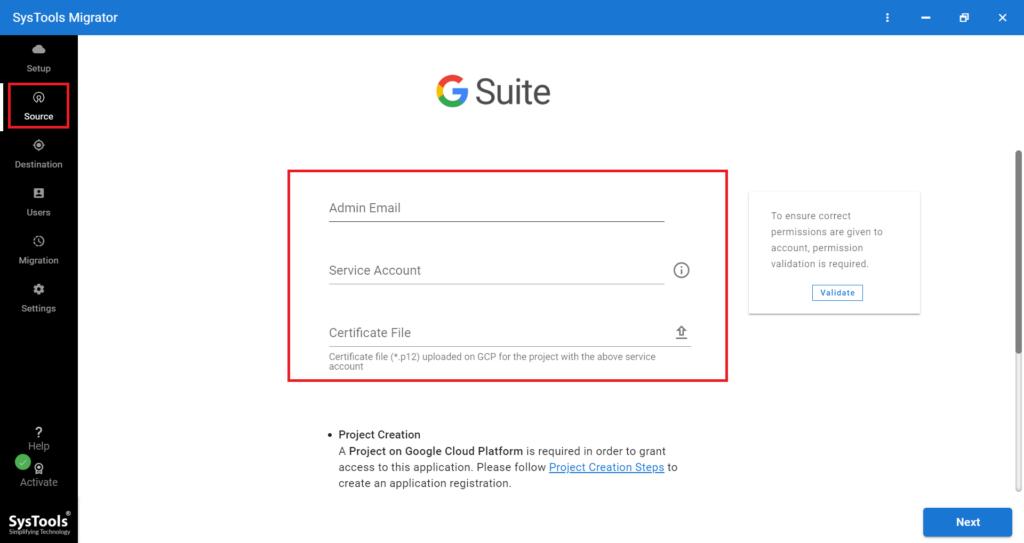
Step 4. Use admin credentials of G Suite and Office 365 to log in and validate the required permissions.
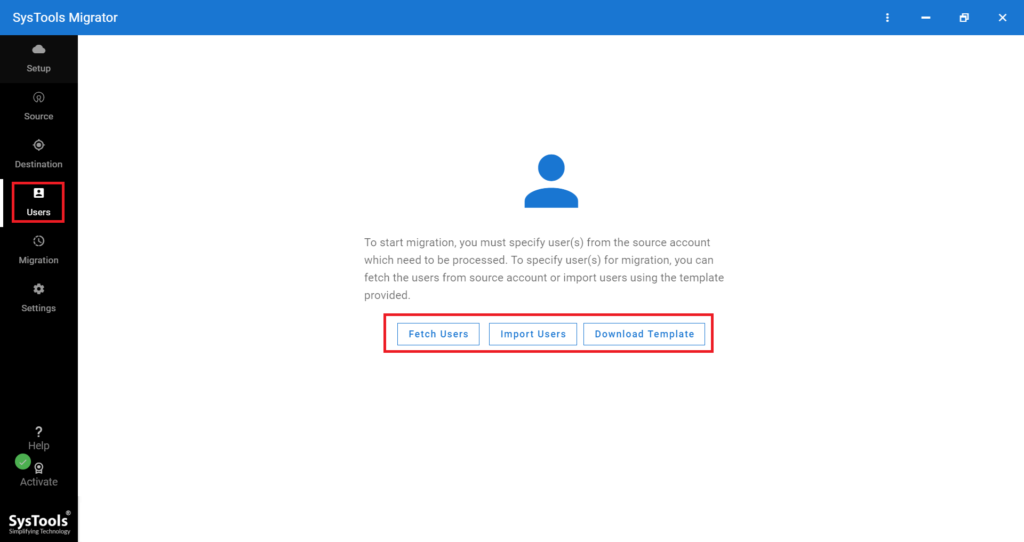
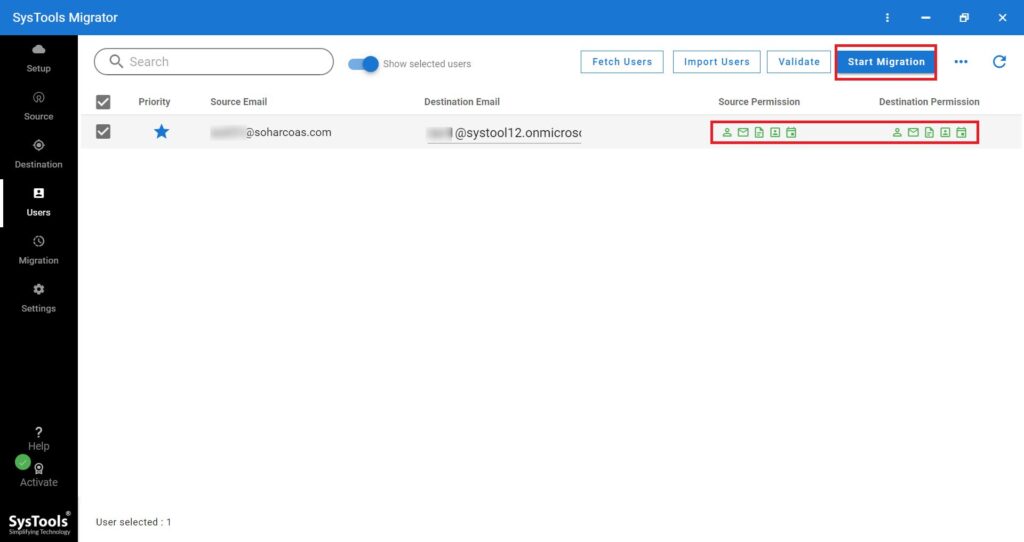
Step 5. You can use any of the options to add users for migration. For instance, Fetch and select user accounts for migration.
Step 6. Set account priorities prior to migration, based on urgency or importance, and click on the start button to migrate Google Apps to Office 365 safely.
Also Read: How to Import Calendar to Office 365 Using PowerShell Commands?
Conclusion
In the given article, we defined both the manual method and professional tool to migrate Google Apps to Office 365. The manual method demands a lot of time and effort but is healthy for your wallet. While the automated tool provides seamless migration of G Suite account data. So, select the method that suits your needs.