How to Import OST File to Outlook 2021, 2019, 2016, 2013, 2010? – Solved
Are you among those trying to figure out how to import OST files into Outlook? If your answer is yes, this blog we will go over the complete solution.
Adding multiple OST files to Outlook is one of the most searched queries that is high on the peak at today’s time. Users are facing a lot of issues while importing their data directly to the account. But, now the time has finally come where you will be able to get the detailed solution to import the bulk OST files to different versions of Outlook such as 2003, 2007, 2010, 2013, 2016, 2019, 2021.
This article will end up your research for importing OST to Outlook profile. Also, all the mentioned steps are verified and secure to follow.
Why Add OST File to Outlook?
- OST file stores the data of the Microsoft Exchange Server. It is generated at the time of Outlook synchronization with Exchange Server and is associated with Outlook that cannot be accessed directly. Therefore, users prefer to convert OST files to PST, to import them into Outlook easily.
- Many times, users face issues while accessing the files on the Exchange server. At that time, it is beneficial to convert into PST to import them into Outlook directly.
- It is better to import the data and do the conversion while moving their mailboxes from one location to another. All this is because OST files can be viewed in a system where it has been created.
Query
“Please help! I am working in an organization where Microsoft Outlook is used for cross-communication. One of my important clients has recently sent me some OST files. I need to go through these files; however, I am unable to add them to my Outlook profile. I cannot ask my client to send the files in another format. Now, I am very confused that how to add OST files in Outlook 2013 and read the emails. This is the reason behind this post. Suggest me any strategy to perform this task in a quick manner.”
Now we understood why import OST files in Outlook. Now let’s move to the solution part.
Methods to Import OST to Outlook
As already mentioned it is not possible to import OST files directly into other versions of Outlook such as 2003, 2007, 2010, 2013, 2016, and 2019. Therefore, these users can opt for any of the methods as per their requirements.
Method-1: With the Export Feature of Outlook
This method is only for active users. It is one of the best features of Outlook that allows users to export Outlook profiles into PST format. Follow the below listed instructions:
- First, you need to launch Outlook
- Then, hit on “File”, then on the option of “Export to a file”, & finally on “Next”
- After this, pick the option of “Personal File Folder (.pst)” & hit on “Next”
- Next, choose that folder, which needs to be exported & put a check on “Include subfolders”.
- Finally, browse to the location for storing the migrated data & click on Finish.
Note: Now you have changed OST file data in Outlook importable file format. Now simply launch the Outlook and use the Import/Export option.
Drawback: It is not valid in following cases, orphaned OST, Exchange down time, another user’s profile.
Method-2: With the Archive Feature of Outlook
If you are performing this method, then you must ensure that your OST files must be in use. This method will help you to make OST file importable.
- First, you need to initiate the Microsoft Outlook profile
- Once it is done, move to File >> Archive
- Choose PST folder and Next.
- A new window will be displayed on the screen, select file/folder for archiving
- In this step, browse to the place where you want to save the archived PST file
- After this, hit on OK, to begin the procedure of archiving
Note: Now you have Outlook data file, simply use Outlook inbuilt Import/Export option and complete the import process.
Drawback: This method cannot add the complete OST data. If users want to import the contacts then this method is not valid.
Best Solution to Bulk Import OST Files into Outlook
Now it is very clear that each manual method brings forth some other limitations with it. Only because of this reason, it is better to convert multiple files to PST first, then import them easily into Outlook. For performing this, we recommend you to use OST to PST Converter and carry out the conversion faster. Let us continue with the step-by-step guide.
This tool has come up with different features making the whole process trouble-free for its users. With this utility, it is possible to add all the OST files in bulk at once. The software also supports orphaned, damaged, or inaccessible OST files and easily imports them without facing any kind of issue. Moreover, it keeps the data safe and secure after the completion of the procedure and it has a simple interface.
Also Read: Migrate OST to Office 365
Step-By-Step Guide to Add OST to Outlook
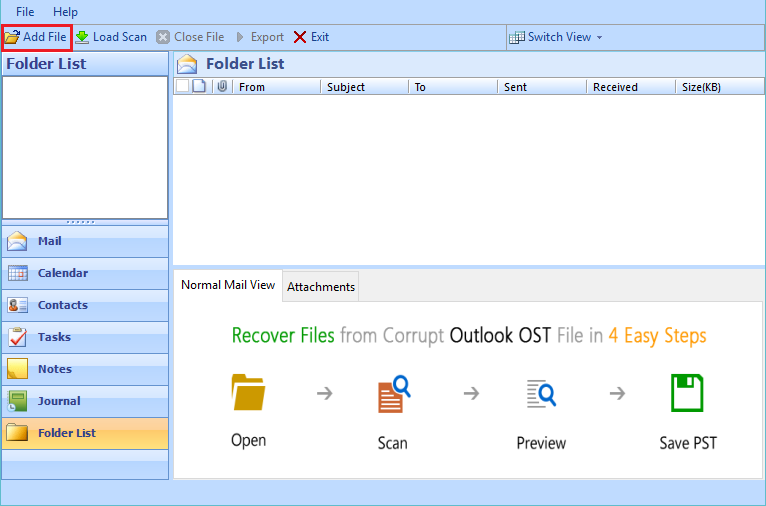
- Firstly, run the given software in your existing system and add the OST file which you want to import into Outlook.
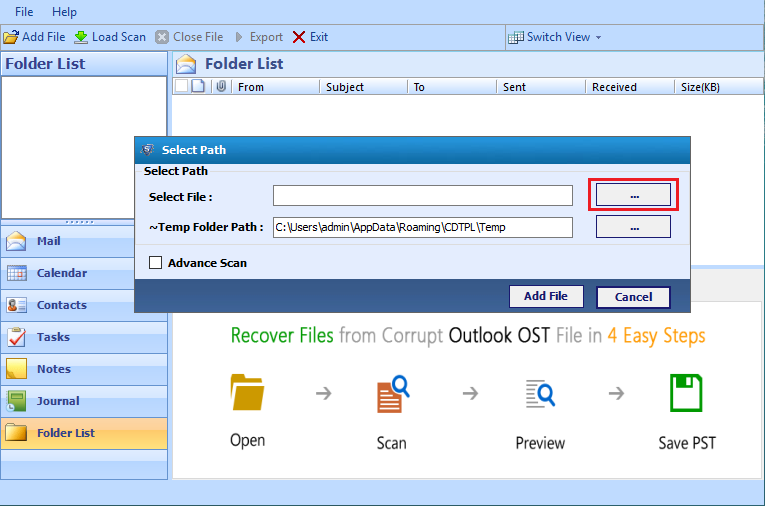
- A new window will pops-up, and browse the OST file from the machine location
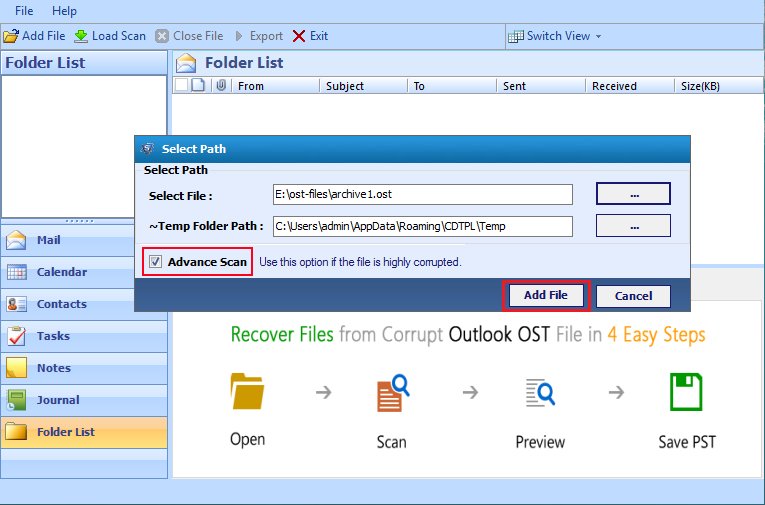
- Now, the tool will perform a quick scanning. Choose Advance Scan Option, if the OST file is highly damaged.
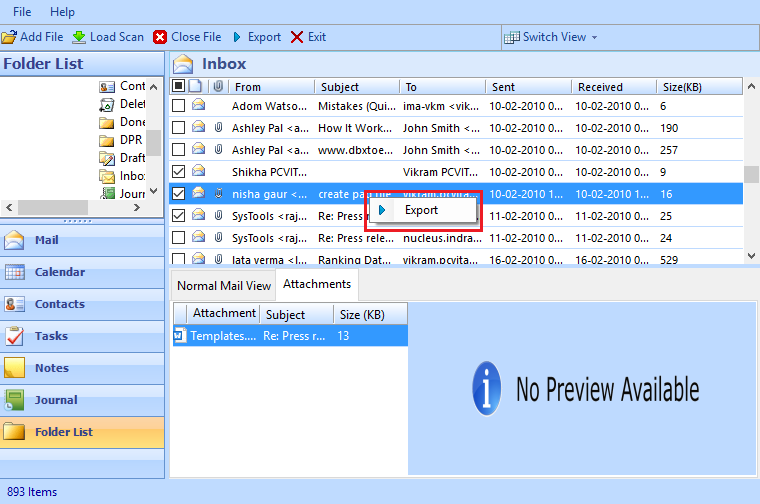
- As soon as the scanning is done, the tool will load the entire OST mailbox in the software panel. You need to click on each folder for viewing the item count & list in the right pane. Here, you can view the email items in different views; Normal Mail View is the default.
- Then, to export a specific email, select the email and then right-click on Export
- An Export window will be displayed, select the needed file format and apply the mail filter. Here, we are choosing PST and with this, you will also receive an option to split PST.
- To export multiple files, choose the Export button placed on Menu Bar. A new window will appear, choose the options.
- Select Folder: For choosing the required folder
- Export As: For choosing the file format
- Split PST: To break large PST
- Browse Destination: To pick the resultant data
- Then, hit on Browse and choose the destination path where you want to store your data. And, select the export option as PST.

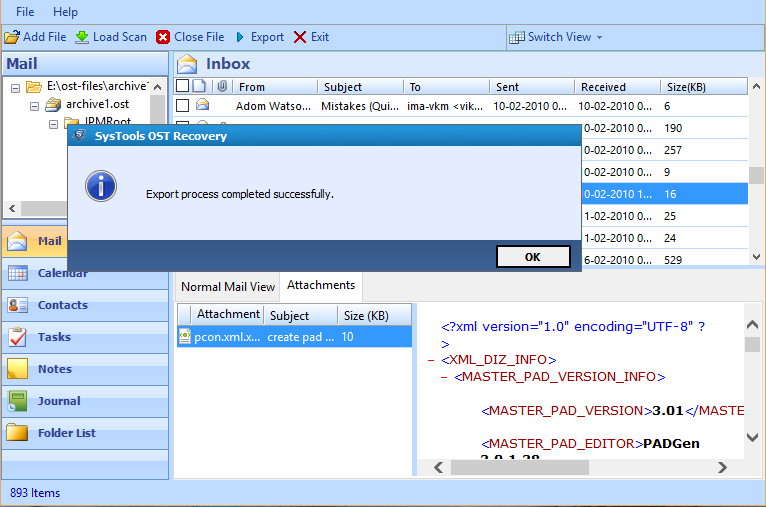
- Wait for a few minutes, the process will be completely done. After the completion of the export process, click on OK to exit.
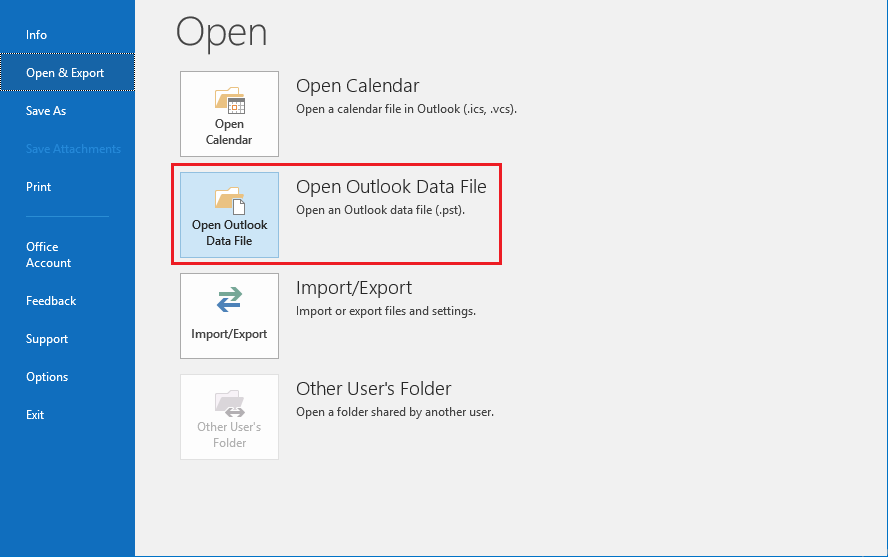
- To import the resultant files in Outlook. Launch Outlook on the system and then go to the File option. Now, click on Open & Export >> Open Outlook Data File
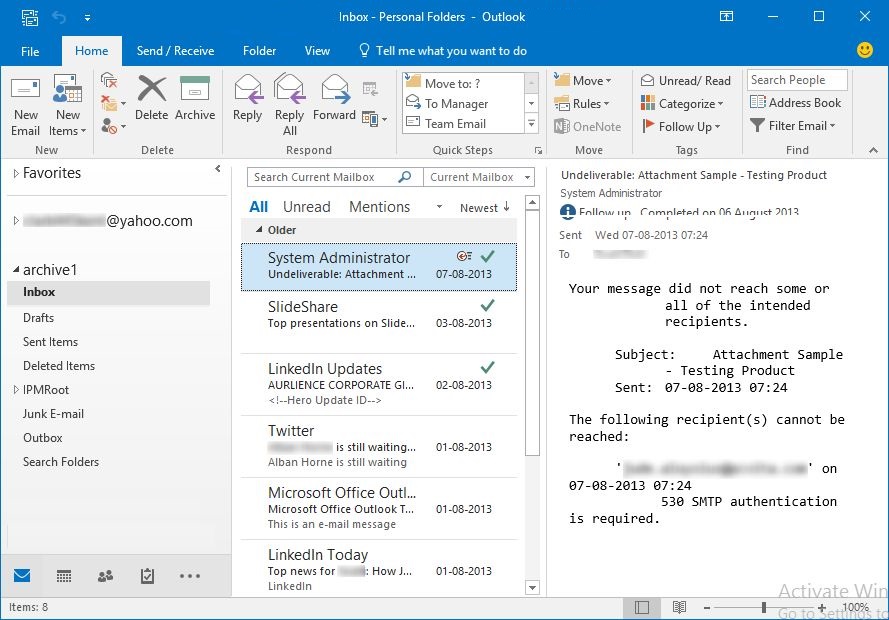
- Finally, you can view the OST in Outlook.
To Sum It Up
OST file plays a very crucial role in the storage of the Exchange Server database. Nevertheless, it is not possible to import OST to Outlook 2021, 2019, 2016, 2013, 2010, and earlier versions instantly. This is the reason that users have to suffer a lot to view these files.
The only option left in front of them is to convert those files to PST first and then, you can be able to add them to Outlook. Therefore, in the above part of this article, we have discussed two manual ways to add OST files to Outlook 2003, 2007, and the above versions.
Apart from the manual procedure, we have also learned a unique way to perform this task. Users can pick any of the methods at their convenience and complete the import OST to Outlook process.

