How to Migrate Custom Domain to Office 365 using Hybrid Configuration?


There are three migration methods that are Staged migration, Hybrid configuration and Cutover migration using which a user can migrate the custom domain to Office 365. The best migration method to migrate the custom domain (Exchange) to Office 365 is Hybrid configuration. As some limitations are associated with other two methods. Now the question crops up, how to migrate the Exchange to Office 365 via Hybrid Configuration? Thus, this write-up will help users to move the custom domain to Office 365 in a secure and reliable manner.
About Hybrid Configuration
Hybrid configuration was introduced by Microsoft in 2016. Basically, hybrid configuration improves and simplifies the migration process, allowing users to configure just a subset of hybrid features. This enables Exchange On-Premise to Exchange Online migration without unnecessary administrative efforts. Now, let us understand how to use hybrid configuration to migrate from Exchange (custom domain) to Office 365 via a step by step method.
6 Step to Migrate Custom Domain to Office 365 using Hybrid Configuration
Step 1: To verify that you own the Domain
-
- The first step is to sign in to Office 365 with your account.
- Now, go to Setting and select Domains.
- On the domain page, click on Add domain option to start the domain wizard.
- Now, type the domain name you use for on-premises Exchange organization and click on Next button.
- Select TXT record for the domain verification. To verify the ownership the TXT record is chosen.
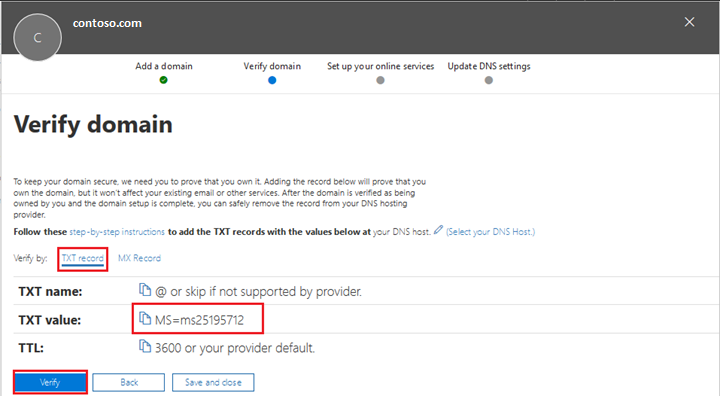
- Once you have added your TXT, wait for approximately 15 minutes before proceeding to next step.
- Then in the Office 365 domain wizard, click on Done and then Verify Now.
- Now, you will see a verification page on your system’s screen.
- Select I will manage my own DNS records and do not continue to the next step in the domain wizard.
Step 2: Start Minimal Hybrid Configuration
To begin the process first, you have to sign in to your Office 365 account using global admin credentials on the system that is domain-joined to your on-premises organization. After sign-in process is complete, start the Hybrid Configuration Wizard from the Data migration page of the O365 admin center. Follow the below steps to initiate this process:
- In Office 365 admin center, go to Setup and the Data Migration
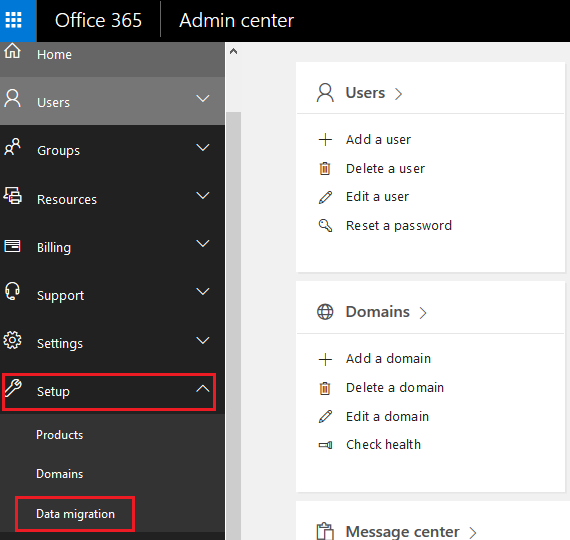
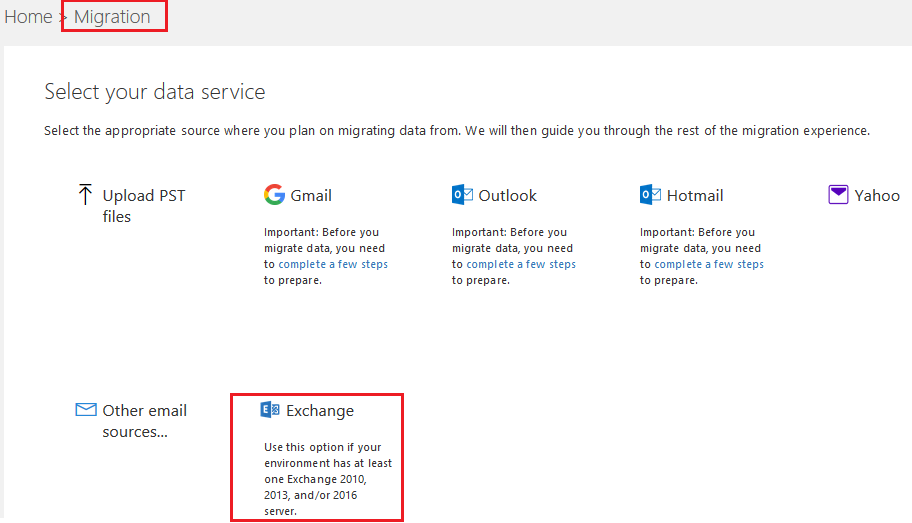
- Now, choose Exchange under Select your data service on the Data Migration page
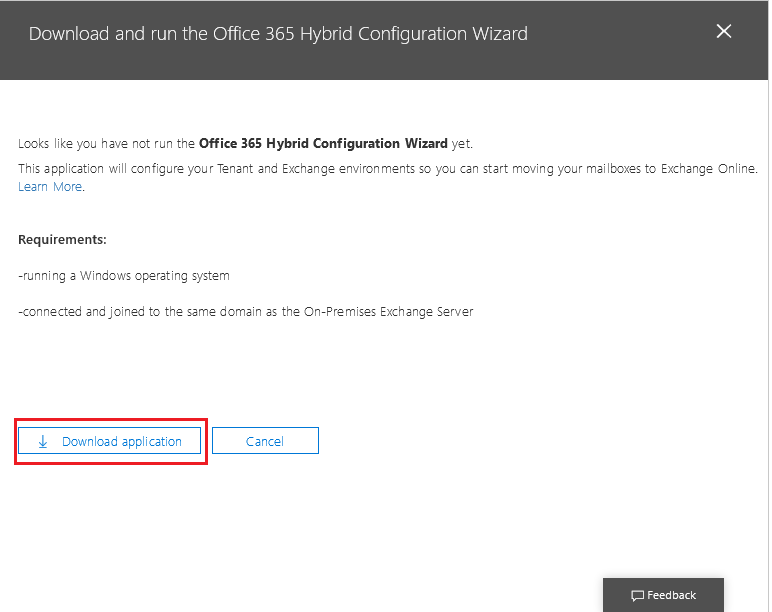
- Download and run the Office 365 Hybrid Configuration Wizard by click on Download application
- Now, you will see a welcome screen on the first Hybrid Configuration Wizard page.
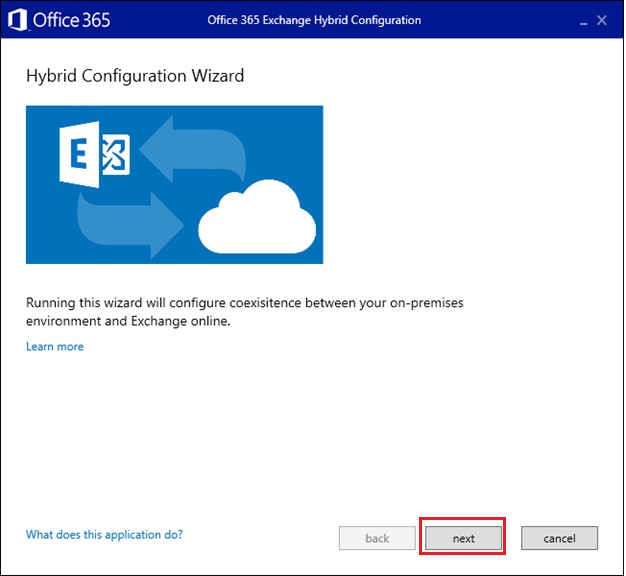
- Click on Next and on the On-premises Exchange Server Organization page, leave the default values as they are.
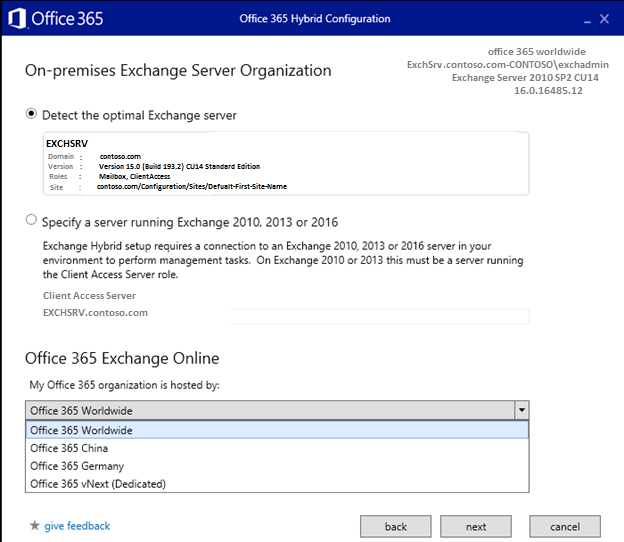
- Then, click on Next. By default, the wizard connects to Exchange Server.
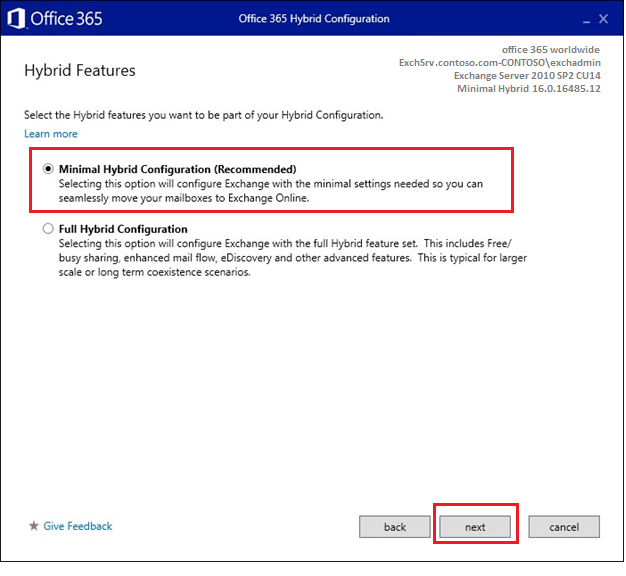
- Select Minimal Hybrid Configuration on the Hybrid Features page and click on Next.
- Click Update to prepare the on-premises mailboxes for migration on the Ready for Update page
Step 3: User Provisioning
- Now, on the User Provisioning page, select the Synchronize my users and passwords one-time option, and click Next.
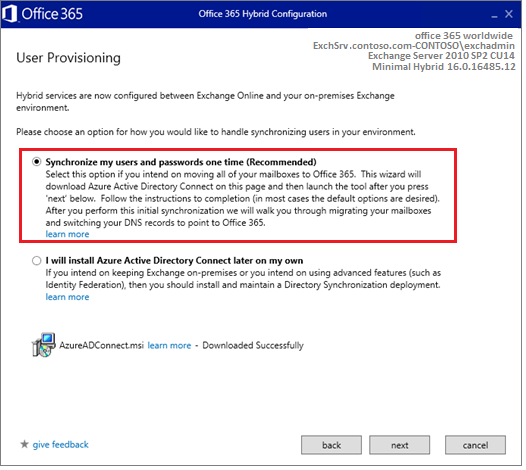
After this, you will be asked to download and install the Azure AD Connect Wizard to synchronize your users from on-premises to Office 365.
- After the downloading Azure Connect, run the program and choose the default option for Express settings.
Now, you will be taken to the Office 365 Data migration page. On that page, you will be able to see all the users who were synchronized to Office 365.
Step 4: Assign Office 365 Licenses to Users
Once Azure AD Connect synchronizes your users and their passwords to Office 365. Then you need to assign Office 365 licenses so that your users will be assigned cloud mailboxes to which their on-premises mailbox data will be migrated.
- Go to Users, in the admin center and select Active users.
- Now, assign licenses to your users.
Step 5: Start Migrating User Mailboxes
- Go to Setup and then Data migration and choose Exchange.
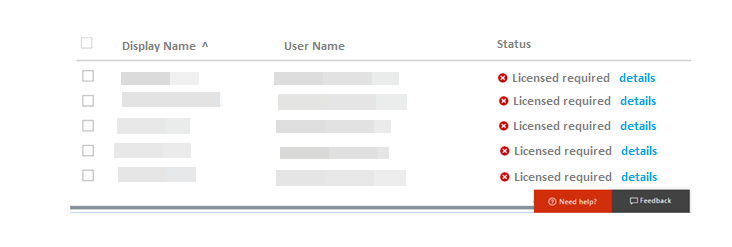
- Now, on the Data migration page, select the users whose mailboxes you want to migrate.
- Click on Start migration.
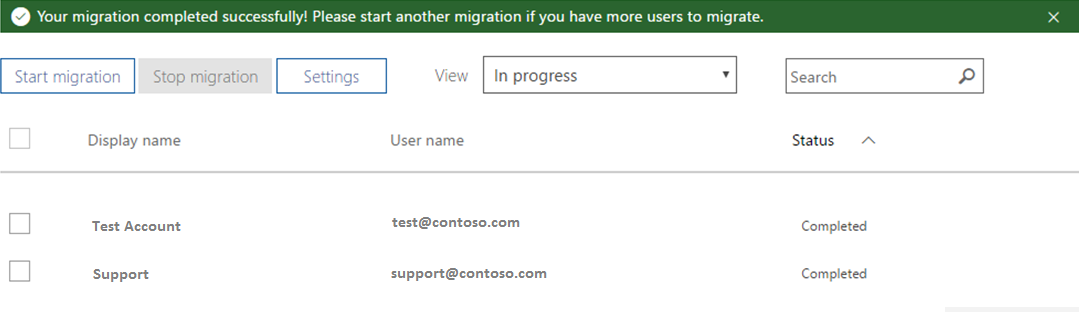
It is advised that you should check that everything is working properly by migrating a few test mailboxes.

You can also view the status of migration process on data migration page.
Step 6: Update Public DNS Records
After the completion of email migration process, all your mailboxes will be migrated to Office 365. You need to change your MX record to point to Office 365 so, all your emails will be routed to Office 365. Now, you have to finish setting up your other DNS records such as CNAME, TXT etc.
A person who is having high technical knowledge can perform the above steps accurately. Sometimes, various problems also arise when a non-technical person tries to perform the above-stated steps. In this case, it is always suggested to go for a professional approach.
Also Read: How to Migrate Exchange Public Folders to Office 365?
Professional Approach to Migrate Custom Domain to Office 365
To eliminate the negative points associated with the manual method it is always recommended to a user to switch to a reliable and secure utility that is Exchange to Office 365 Migration. Basically, this utility migrates mailboxes from On-Premise Exchange without any hassle. Some of the highlighted features of this tool are:
- Export Unlimited Emails, Calendar Events, Contacts into O365 Account
- Supports Migration of Exchange On-Premise User Mailboxes
- Date-Filter: To filter and transfer data from a particular date range
- Transfer up to 200 Mailboxes in one go using Concurrent Migration
- Migrate new data that arrived while old data was getting migrated
- Include Sub-Domain users and migrate data from sub-domain as well

How does the tool work?
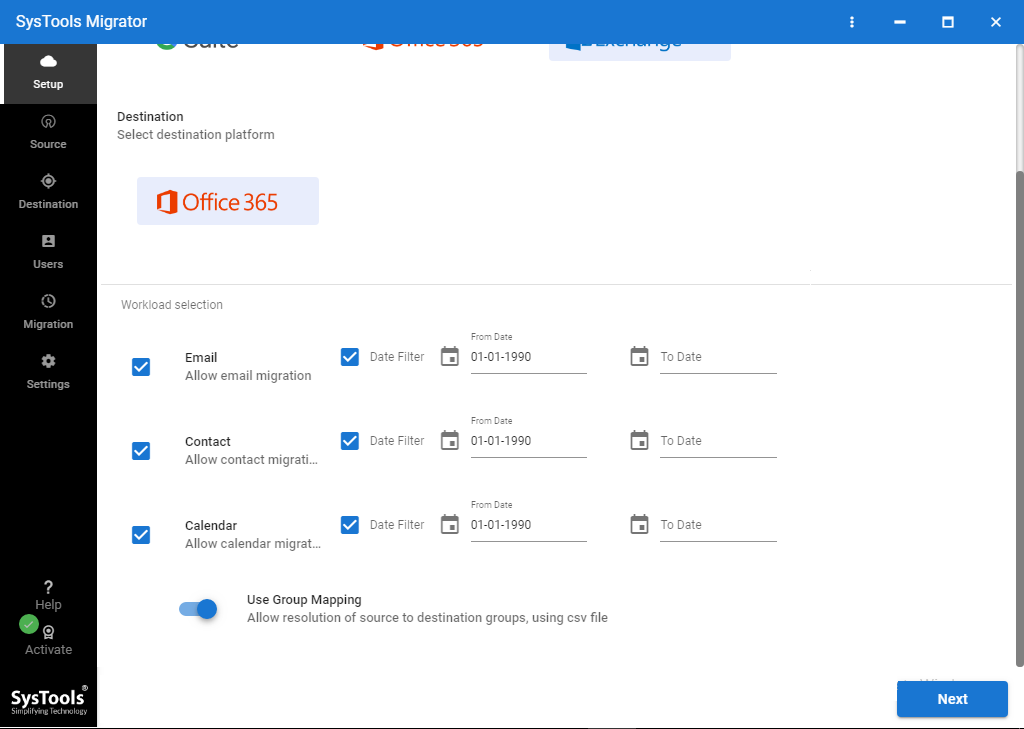
1. Open software on Windows OS and select migration platforms. Here, we will select Exchange and Office 365.

2. You can also apply various filters provided in the tool.
- Category Filter helps you to exclude any mailbox item if you want to.
- Date-Range filter allows you to migrate only required items arrived in the particular date range.
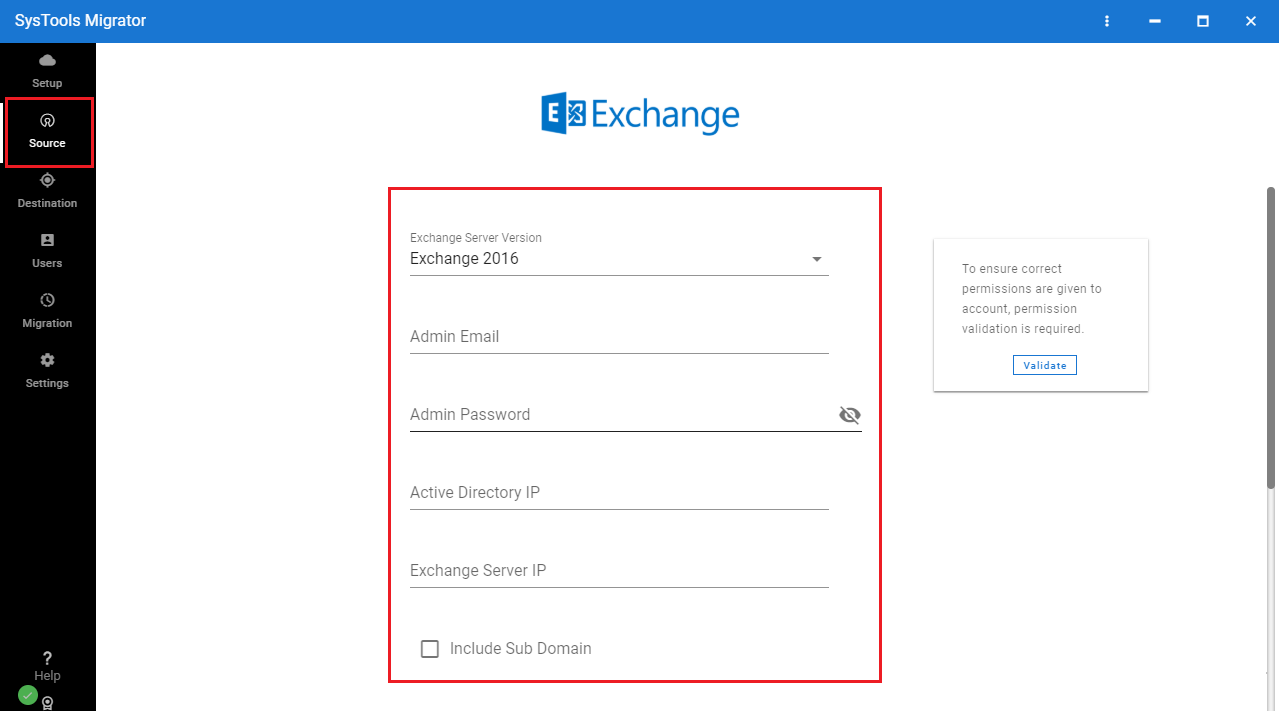
3. Then, you have to enter all the necessary Exchange details in the fields. If you want to export data from Sub-Domain mailboxes as well, then you can enable the checkbox.
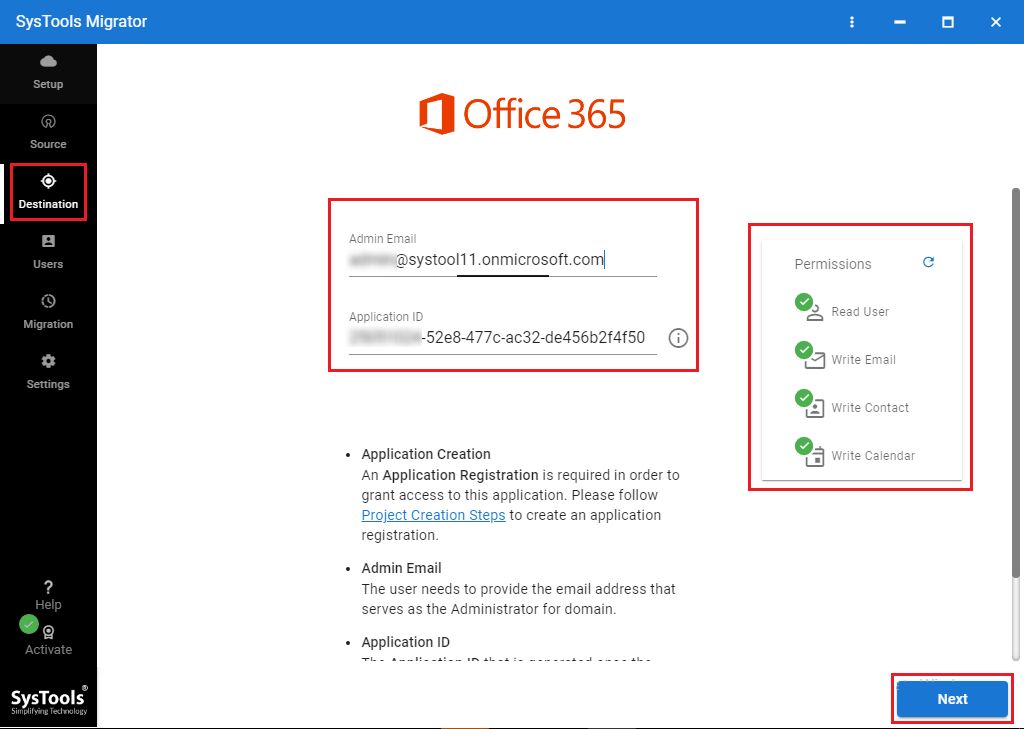
4. Under Destination platform, you have to enter Office 365 Admin ID and Application ID to validate permissions.
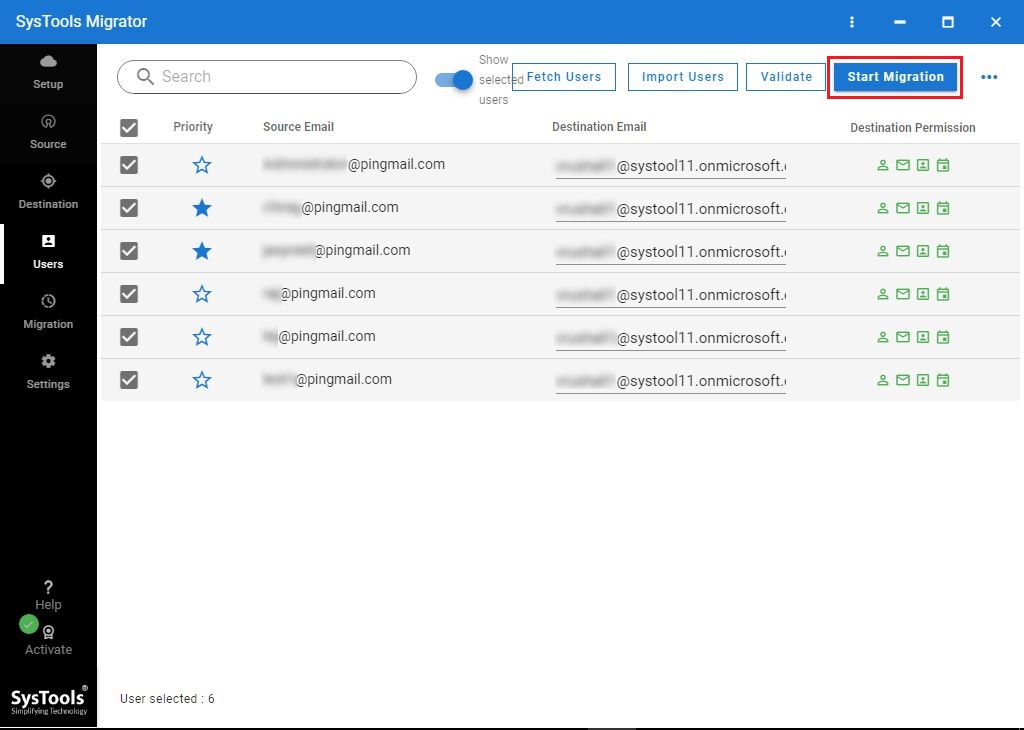
5. After adding users for Exchange Server and mapping them with O365 mailboxes, you can click on Start Migration button.
Conclusion
In a nutshell, a user can migrate the custom domain to Office 365 via Hybrid configuration. But it is only possible for a person who is having good technical knowledge. Therefore, a professional approach is also discussed above for users with no technical knowledge. So, after reading this write-up a user can easily migrate Exchange to Office 365 in a proficient way.