Import PST to Exchange Online via Network Upload and Drive Shipping


In upgrading to any new technology there are always some data files that are left behind. These are archived by employees and saved to their personal computers for backup and future reference. But during the migration, all these files need to be saved to Office 365 cloud servers. To do so administrators look for multiple ways to efficiently import PST to Exchange Online mailbox. Therefore to fulfill the requirements of the administrators we explain the manual steps to migrate PST files to the Exchange Online.
These manual methods can upload multiple PST files to Office 365. Continue reading to find out more. So let’s continue and find the different methods to upload PST files to Exchange Online.
Different Solutions to Move PST Files to the Exchange Online Mailbox
There are different solutions to upload PST to Exchange Online such as Network upload and Drive shipping. So, let’s start with each & every method sequentially.
Solution#1 Network Upload to Import PST to Exchange Online
Step 1. Copy the SAS URL & install Azure AzCopy
- First, log in to https://protection.office.com/ using Office 365 admin credentials. Then, go to Security & Compliance Center>>Data Governance>>Import.
- From the ‘Import’ page, click on ‘+New import Job’. This will help with the upload of PST files to the Office 365 cloud server.
- Enter the name for the process from the ‘Import Job Wizard’ screen and click the Next button.
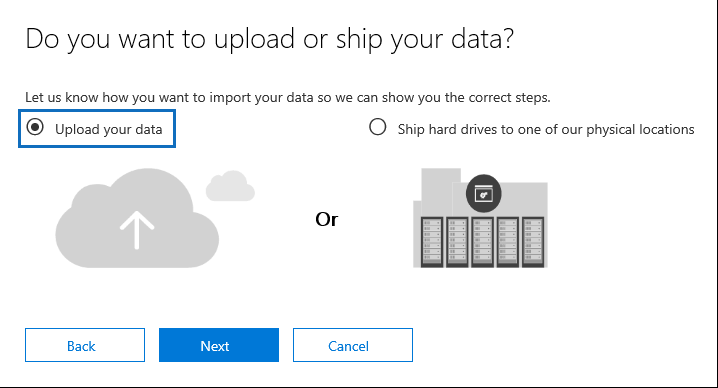
- In the ‘Do You Want to Upload or Ship Data?’ screen, go to Upload your Data >> Next.
- Now, copy the SAS URL and download the Azure AzCopy tool
Step 2. Directly Import PST to Exchange Online
- First, launch Command Prompt and go to the directory where the AzCopy.exe tool is installed.
Then, run the following command:
zCopy.exe /Source:<Location of PST files> /Dest:<SAS URL> /V:<Log file location> /Y
Step 3. View the List of Uploaded PST Files
- Set up the Microsoft Azure Storage Explorer tool. This will help to upload PST to Exchange Online mailboxes.
- Then, launch the utility and go to Storage Accounts >> Connect to Azure storage
- Then, go to Use a shared access signature (SAS) URI or connection string >> Next.
- From the ‘Connection Summary’ page, click Connect and go to Storage Accounts >> (SAS-Attached Services) >> Blob Containers >> ingestion data. This will contain all the PST files.
Step 4. Create Import Mapping File
- First, download a copy of the sample provided and save it to the system.
- Then, populate the entries according to the company’s essentials. This is an important step regarding the process of moving PST files to the Exchange Online cloud.
Step 5. Create Import Job in Exchange Online
- Again, go back to ‘Import Data’ page, and mark the checkboxes as shown in the image below.
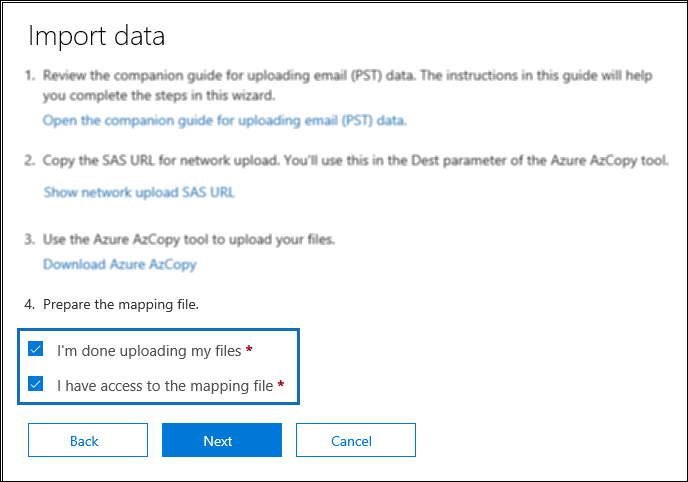
- Then, click on the Next button to import PST to Exchange Online mailbox.
- From the ‘Select the mapping file’ page, upload the CSV created in the previous step.
- Then, validate it accordingly and click on the Finish button.
- From the Import data to the Exchange Online page, the job is listed. Click on refresh to check the current status and View Details to get the latest updates.
Also Read: How to Migrate Exchange On Premise to Office 365?
Solution#2 Via Drive Shipping
- First, copy all the data to a Bit-encrypted drive and ship it to the Microsoft data center team. The Microsoft charges 2$ for 1 GB of data.
- Make sure the data has been encrypted as per the Microsoft policies.
- They will upload it to their servers in two or three months.
- Finally, the Exchange Online import utility can be used to extract PST files for Outlook use.
Direct Way to Upload PST to Exchange Online Mailbox without Outlook
The company expects no cost-cutting when making such a high leap and decision in upgrading its server environment. They are willing to put aside a small budget for extra efficiency and reliability. They look for third-party tools that are the best solutions and pioneers in their market.
Use professional solutions like Office 365 Import Tool, which is specially designed to import PST to Exchange Online mailboxes. It provides accurate results with guaranteed no data loss. It has multiple options to set the date-based filter, include a folder, and select between items. The software is compatible with all the latest or earlier versions of Windows. After moving to the Exchange Online, you can easily migrate mail from one Office 365 account to another.
Quick Steps – Import PST to Exchange Online Mailbox
- Step 1. Download and set up the tool. Select Outlook as the Source platform and Office 365 as the destination.
- Step 2. Select the items from the workload section and apply the date filter if necessary.
- Step 3. Enter the path of the PST file in the Source tab. Validate it and move to Next.
- Step 4. Now in the Destination window, complete the credentials of the Office 365 account, validate them, and Next.
- Step 5. Load all the source and destination users into the tool.
- Step 6. After successfully validating both the Source & Destination users. Click on the Start Import button.
Conclusion
Migrating the crucial data of the PST file to the Exchange Online server is necessary. There are different benefits of Exchange Online. But when there is a need to import PST to Exchange Online then admins try to search for the different solutions. That’s why we explain the manual and a professional solution to complete the process efficiently.