Import MBOX to Office 365 – A Step Closer Towards Cloud


The increasing demand for Office 365 has shocked the entire computer industry, with Office 365 becoming the most preferred and used utility. All across the globe people are changing their email client and migrating to Office 365. Since many of these email clients use MBOX to store email data, importing MBOX files to Office 365 has turned out to be a major concern.
Especially if you add the fact that you can only import PST file to Office 365 and even that requires technical expertise. Since O365 does not support the MBOX format, you have to look for other alternatives. Thus, we have covered 2 easy methods to migrate MBOX to Office 365 in an easy manner.
Table of Content:
Microsoft unveiled Office 365 not only with multiple software in a suite but also with services like Skype for Business Server, SharePoint, Active Directory integration, e-discovery Center, etc. For consumers, the service allows the use of Microsoft Office apps on Windows and MacOS, provides storage space on Microsoft’s cloud storage service, and grants 60 Skype minutes per month. For business users, Office 365 offers service plans providing emails and social networking services through hosted versions of Exchange Server.
The Need to Import MBOX to Office 365
There can be many reasons, such as:
- If you are transitioning from a desktop email client that uses MBOX to Office 365 platform, you will need to import these files to retain your data.
- Employees of an organization use different email clients for their purpose. And the organization decides to consolidate the email system by moving all the employees to the Office 365 platform.
- MBOX files being the desktop client files are sometimes difficult to work with. These applications create trouble in opening MBOX files. All the applications that support MBOX file format are desktop-based email client applications. It restricts the accessibility of mailbox to the desktop only. Thus, users find it difficult to access emails anywhere and anytime. With the increasing emails and other data items, the MBOX file gets oversized it becomes difficult to work with such large sized MBOX file.
How to Migrate MBOX to Office 365 for Free?
Since Office 365 does not support MBOX format, we lack any official means to import MBOX to Office 365 account. However, by making use of a desktop email client that supports MBOX format and IMAP configuration, you can get the job done.
Step 1: Convert MBOX Files to EML:
- Launch Mozilla Thunderbird and navigate to the folder from where emails are being exported.
- Select emails that you need to export to EML.
- Right click on highlighted emails and select Save As an option to store all the files in EML format.
- The emails are now in EML files.
Step 2: Transfer EML to Outlook:
- Launch Outlook and create a new folder that receives EML files.
- Open the location on your system that has all the EML files.
- Select all the EML files.
- Drag and drop them into Outlook’s recently created folder.
- Export this EML folder to PST file using Outlook’s Import/Export feature.
Step 3: PST to Office 365
There are two procedures to manually perform this task.
1. Use network upload –
- Install Aure AzCopy.
- Upload the .pst file to Office 365.
- Create the PST importing mapping file.
- Create a PST import job in Office 365.
- Filter the data and start the PST import.
2.Use drive shipping – Drive shipping means you can copy the PST files to a hard disk drive and then physically ship the drive to Microsoft.
- Download the PST Import tool and a secure storage key.
- Copy the PST files to hard disk.
- Create PST import mapping file.
- Create PST import job.
- Ship the hard drive and filter data to start PST import job.
How to Upload MBOX Files to Office 365 using Email Client & IMAP?
Here, you will use Thunderbird as the email client since it has the option to connect to Office 365 account as well as it supports MBOX format. So, you can use it as a bridgehead between MBOX and Office 365 account.
- Launch Thunderbird on your computer.
- In Thunderbird, click on “Menu” (three horizontal lines) in the top-right corner, then select “Options” and click on “Account Settings” from the drop-down menu.
- In the Account Settings window, click on the “Account Actions” button at the bottom-left corner of the window. From the drop-down menu, select “Add Mail Account.”
- In the Mail Account Setup window, enter your name, Office 365 email address, and password. Click on “Continue.”
- Thunderbird will try to automatically configure your Office 365 account settings. It will detect the server settings and complete the setup process.
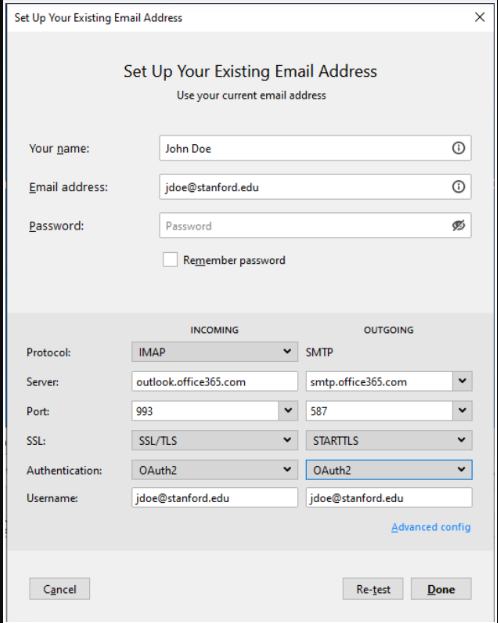
- Once Thunderbird successfully verifies the settings and establishes a connection, click on the “Done” button.
- Now, go to Tools >> Add-ons & Themes and search for ImportExportTools add-on in the search bar.
- Install the ImportExportTools NG add-on.
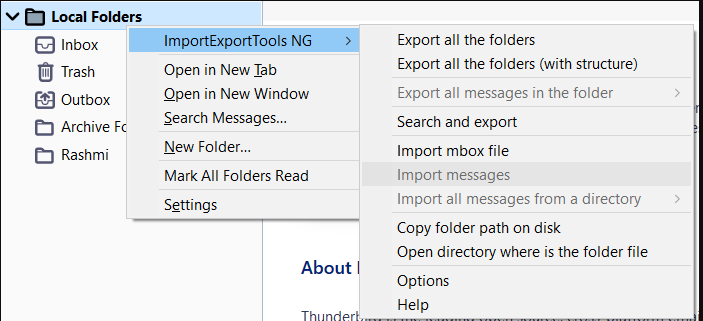
- Once done, right-click on Local Folders in Thunderbird.
- Choose ImportExportTools NG >> import mbox file and proceed to import the MBOX file in Thunderbird.
- Now, the MBOX file is present in Local Folders while the Office 365 account is configured separately.
- Next, copy the emails from imported MBOX and move them to the Office 365 account.
- That’s it. Since the account is configured in IMAP, the emails will get synchronized and will appear on the Office 365 server.
Automated Solution to Import MBOX to Office 365
MBOX to Office 365 Migrator is a smartly programmed tool to upload all MBOX files to Office 365. The tool has lifetime license validity and 24*7 technical support on the purchase. It provides various features like importing MBOX files in bulk, Supports to Migrate MBOX file of Apple Mail, Entourage, Eudora, Thunderbird to Office 365, allows to Import Data with or without Impersonation, supports to maintain folder hierarchy throughout the process which makes this very unique and outstanding from other.
Simple Steps to Migrate MBOX to Office 365
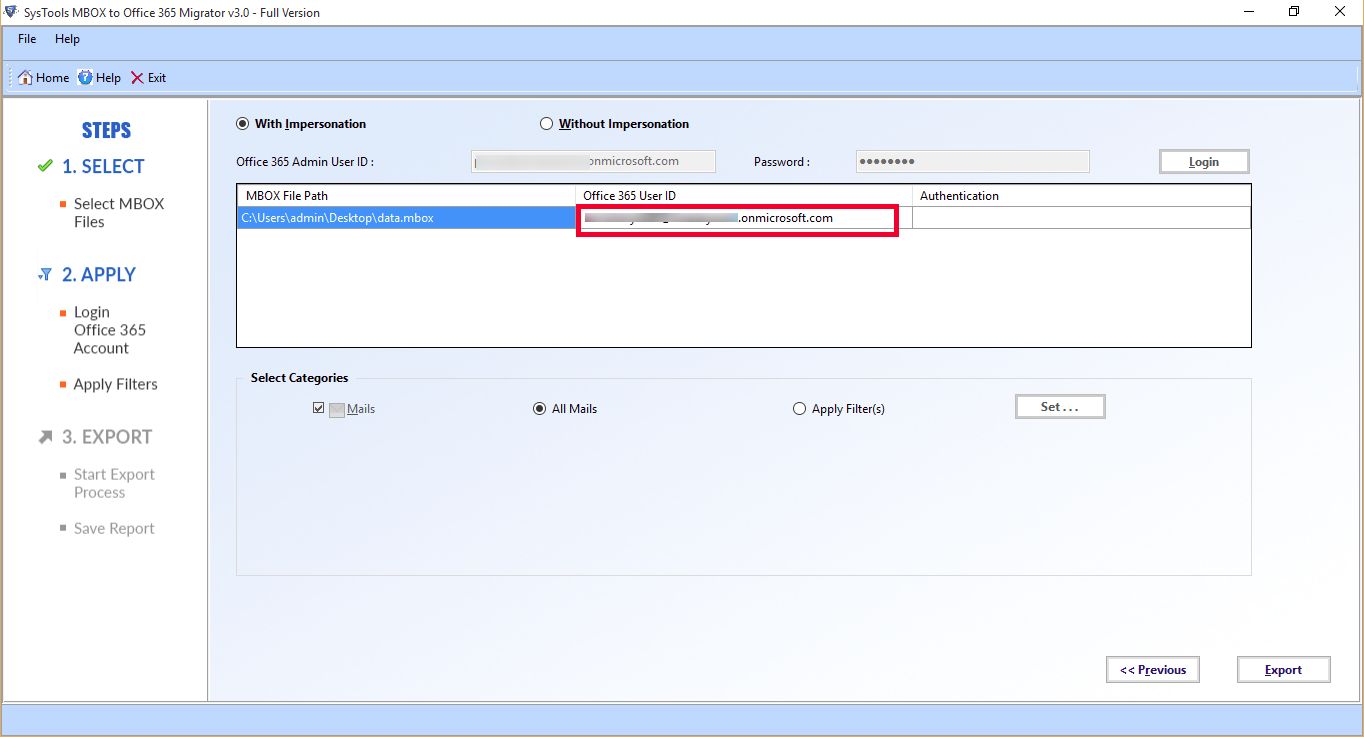
- Step 1: Run the software & import MBOX files
- Step 2: Select either With or Without Impersonation setting.
- Step 3: Input required User / Admin Office 365 credentials
- Step 4: Set filters and click “Export” to migrate MBOX to Office 365.
Verdict
After observing various shortcomings of MBOX files and uploading issues, many users search for a reliable and efficient solution like Office 365. The best way is to use third party tools that guarantee to import data without any loss. The process is a bit lengthy and mind scratching but the outcomes are extremely commendable. MBOX to Office 365 conversion is so demanding that the used of software is much needed.